How to Add a Caption to an Image in Google Docs

Captioning an image can provide additional useful information. Learn how to add a caption to an image in Google Docs.
Knowing how to add a caption to an image in Google Docs can be incredibly useful—after all, a picture is worth a thousand words, but sometimes you need one or two more. When you add multiple images into your presentation, you might want to provide additional information, context, or proper attribution for the illustration or photo that you’re using.
If you want to add a caption to spreadsheet images, you can just type some text directly underneath the image that you insert in Google Docs. This might not always be the best option, especially if you may need to move the image around at some point. If you want to save yourself some time in the long run, follow the steps below instead.
How to Add a Caption in Google Docs Using the Drawing Tool
There are several ways to add a caption to an image in Google Docs, but using the Drawing Tools is one of the best. That’s because when you’re done, the caption is tied to your image. If you need to move your image around, the caption will move with it, so you don’t have to worry about getting your caption back in the right place every time you move the image.
- Open the document where you want to insert your image and caption.
- Click the Insert menu.

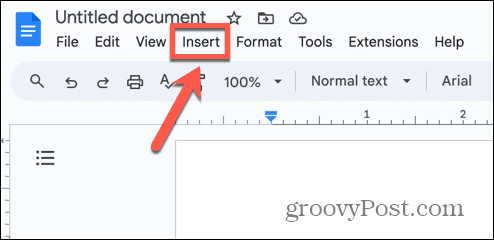
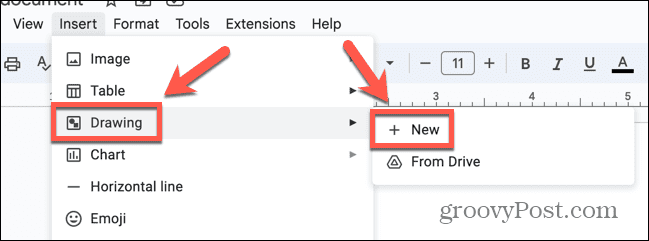
- Select Drawing > New.

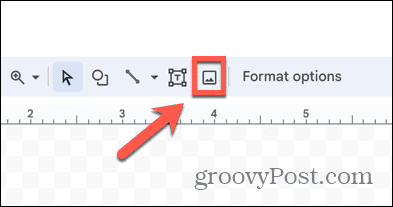
- In the Drawing toolbar, click the Image icon.

- Choose how to insert your image. You can drag one into the Drawing window, Upload one, enter one By URL, select one from Your Albums, insert one from Google Drive or Search for one online.


- Once your image is inserted, click the Text Box icon in the toolbar.


- Drag out where you want your text box to appear.


- Enter your text.

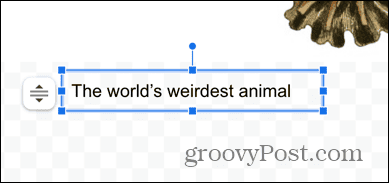
- You can format the text using the text tools in the toolbar.


- When you’re happy, click the Save and Close button.
- Your drawing, containing both the image and text box, is inserted into your document.

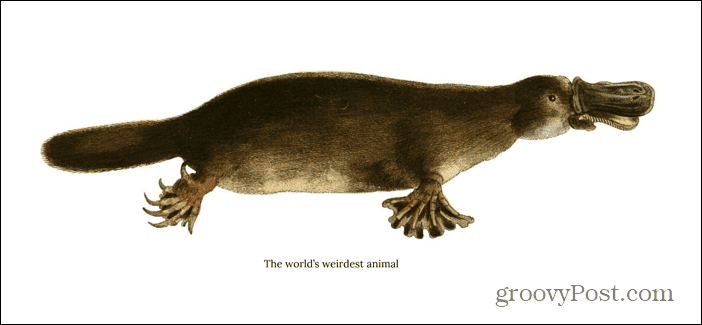
- You can move the image around, and the caption will move with it.
- If you need to edit the caption, double-click the drawing, and you can edit the text within the text box.
How to Add a Caption in Google Docs Using a Table
Another way to tie your caption to your image, so that the caption will always remain in place when you move the image around your document, is to use a table. By creating a table with two rows, you can place your image in the top cell, and the caption in the bottom. By removing the borders of the table, you will create an image with a caption that’s tied to it, so that when you move your table, both the image and caption will move as one.
- Open Google Docs.
- Click the Insert menu.


- Select Table and drag out a 1×2 selection of blue squares.

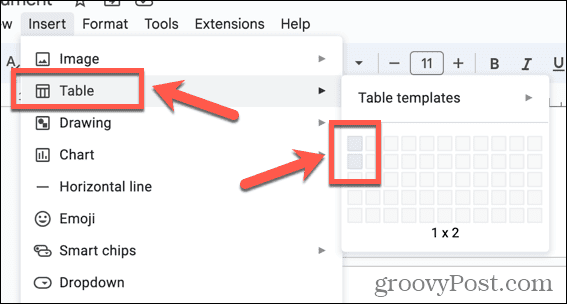
- Your table will be inserted into your document.
- Click in the top cell of your table and click the Insert menu.


- Select Image and choose where to insert your image from.

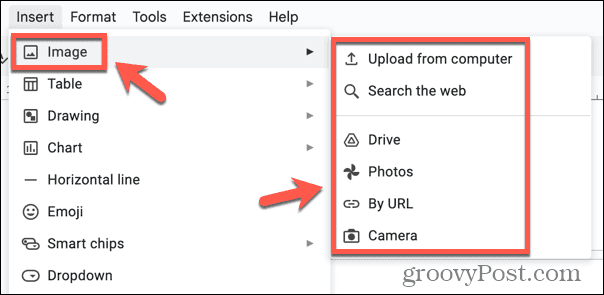
- Once your image is inserted, click in the bottom cell of your table.
- Enter your text.


- You can format your text using the text tools in the toolbar.


- If the format tool you need isn’t in the toolbar, click the Three Dots icon to see more tools.

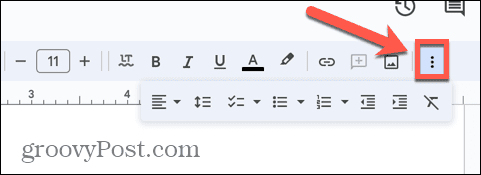
- To resize the table, click and drag the borders to reposition them.
- When you’re happy with your caption, right-click your table and select Table Properties.

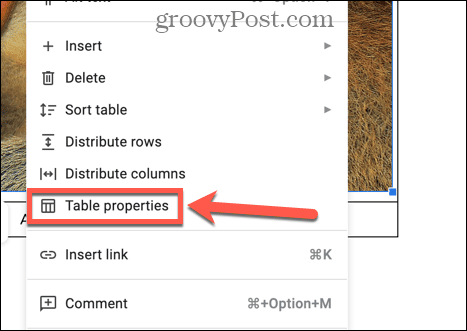
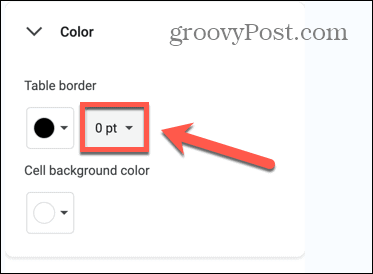
- Under the Color options, change the Table Border to 0 pt.

- Your caption is now tied to your image; if you move the table, the caption will move along with the image.


How to Add a Caption in Google Docs Using Inline Text
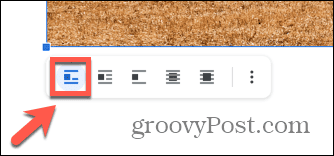
If you’re wondering how to caption a photo in Google Docs, and you just want to quickly add a caption to an image without moving it around, you can simply add the text directly beneath your image. You’ll need to select the In Line wrapping option so that the text will appear directly beneath your image. However, if you decide to move the image later, the text won’t move with it, so you’ll then have to reposition the text too.
- Open the document you want to add your captioned image to.
- Click the Insert menu.


- Select Image and choose one of the image insertion options.


- Click the image.
- In the options that appear beneath the image, select In Line which is the first option.

- Place your cursor directly beneath the image and type your caption.


- You can format the caption using the text formatting tools in the toolbar.


- When you’re done, your image will have a caption.


- If you move your image, your caption won’t move with it.


Get Creative in Google Docs
Learning how to add a caption to an image in Google Docs allows you to add additional information to your image. It could be information that explains more about what the image represents, or it might be an attribution for where the image is from. If you’re likely to need to move the image around when working on your document, then we’d recommend using one of the first two methods. Even though they take a bit more time at first, once you complete them, you can reposition the image and caption together quickly. This means you won’t constantly have to move your caption to align it with your image.
There are plenty of other ways that you can get more creative when using Google Docs, as the free word-processing application has a lot of useful features. For example, you can learn how to flip an image in Google Docs. This allows you to create a mirror image of your picture in just a few clicks. Using an image and its mirror together can create some interesting visual effects to make your documents more appealing, so it’s worth giving it a try.
Leave a Reply
Leave a Reply


