How to Layer Images in Google Docs

While Google Docs isn’t the best place to edit images, you can make some small changes, such as layering images together. Here’s how.
While it isn’t designed to be a fully-fledged image editor, you can make some changes to images in an online text editor like Google Docs.
For example, you might want to layer images in Google Docs—you can’t just drag and drop images underneath the written text. Instead, you’ll need to use a few workarounds.
If you’re unsure how, here’s how to layer images in Google Docs.
How to Add Text to Images in Google Docs
An easy way to layer images in Google Docs is to insert an image and add a text overlay to it. This is possible using Google Docs’ own drawing tool.
To do that, use the following steps:
- Open Google Docs in your browser.
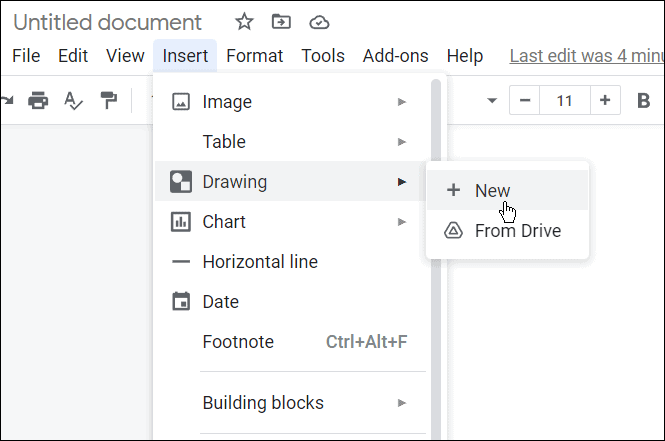
- Click Insert > Choose Drawing > New from the toolbar.

- The built-in Drawing module will come up—click the Image icon to add a background image.

- Insert the image you want to use in the Drawing panel. You can get the picture by uploading one via URL, Your albums, or in our example, we’re using a shot from our own Google Drive storage.

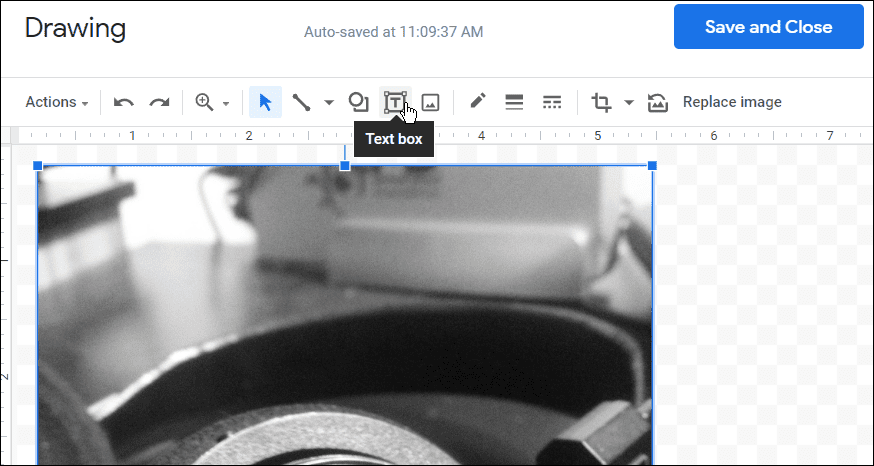
- Now, since the image is in the Drawing panel, you can add text to it—click the Text box from the toolbar.

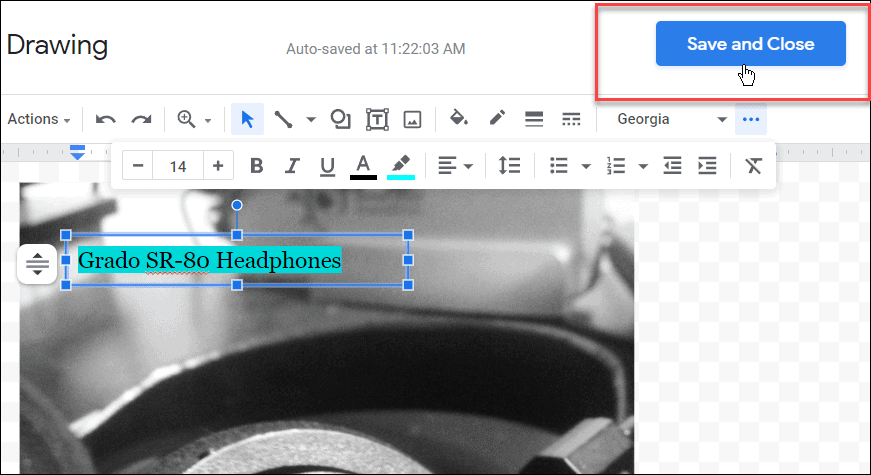
- Once you’ve added text, use the toolbar at the top to customize the font, color, and text style.

- After adding text to your image, click the Save and Close button at the top.


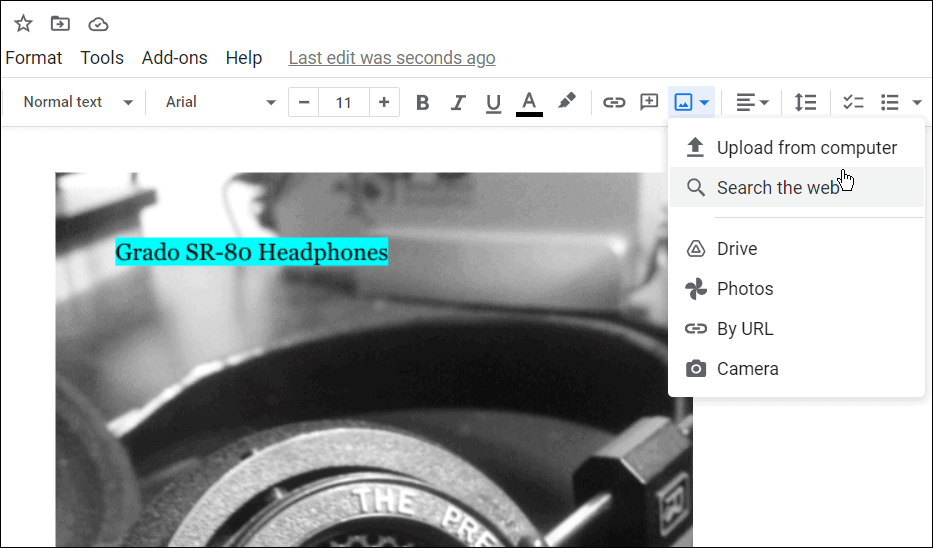
If you need to edit this image further, double-click the image in Google Docs. That will bring you to the Drawing panel tool, where you can edit other elements of the picture.
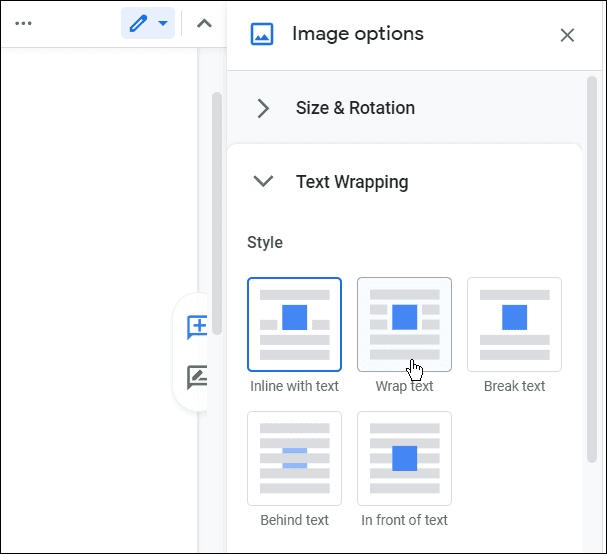
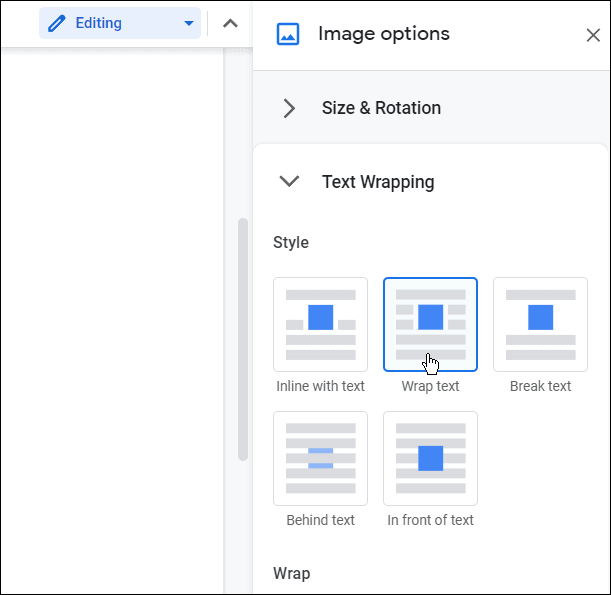
How to Use Text Wrapping to Overlay Images in Google Docs
You can use the text wrapping feature in Google Docs to layer images above one another. It will help if you use the Wrap Text option to move images, which Google Docs doesn’t enable by default.
To use the Wrap Text option to overlay images, use the following steps:
- Open your Google document and insert an image into the document (if you haven’t already).

- Select the image you added to the Google Doc and click All image options.

- Click on Wrap text from the options on the right.

- Add a second image to the Google Doc and select it, then click All image options > Wrap text.

- Now that both images have Wrap Text properties, move the photos over each other so it works for your document.


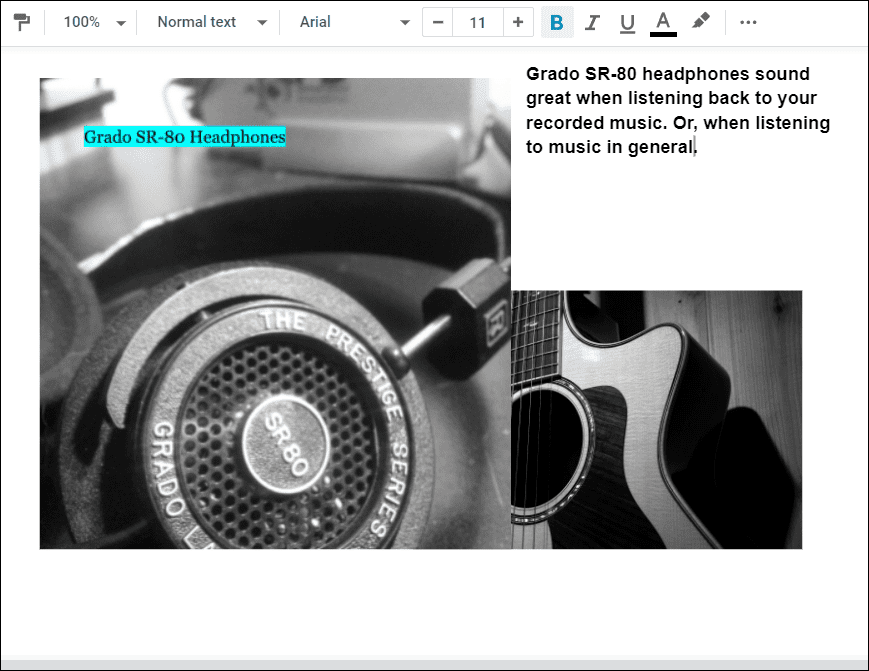
Now you can finish up your document by arranging your layered images better and adding some text if appropriate for the document.
Using Google Docs Features
Layering images in Google Docs isn’t the productivity suite’s only feature. For example, you can write fractions in Google Docs or set up MLA format in Docs. And when it comes to academic documents in schools, colleges, and business presentations, you might want to check Google Docs for plagiarism.
It’s worth noting that you can create and insert a watermark in Google Docs. Also, you can use Google Docs offline, which is helpful in situations when you have a spotty data connection or none at all.