How to Insert a Checkbox in a PowerPoint Table

If you want to make your presentation more interactive, add clickable checkboxes. Learn how to insert a checkbox in a PowerPoint table.
We’ve all sat through boring PowerPoint presentations that are just a succession of slides filled with walls of text. The presenter then proceeds to read out the text, even though we can all read it for ourselves.
Good presentations do things differently. With planning and good design, you can make your presentation genuinely interesting. One thing that can help is making your slideshow more interactive. Having objects that you can interact with during your presentation, such as clickable checkboxes, can help elevate it from the mundane. If you want to make your slideshow more interactive, here’s how to insert a checkbox in a PowerPoint table.
How to Insert a Table in PowerPoint
Before you can insert a checkbox in your PowerPoint table, you need to insert the table itself. You can quickly add a table to your presentation from the Insert menu.
To insert a table in PowerPoint:
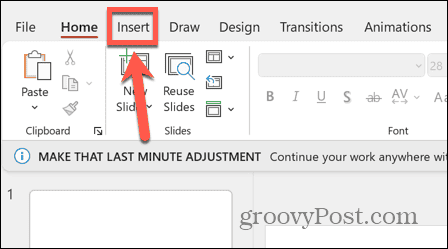
- Open your presentation to the appropriate slide and click the Insert menu.

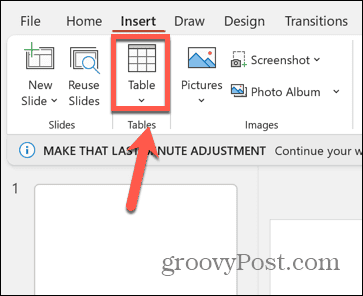
- Click the Table button.

- Drag out the number of rows and columns that you want. For example, if you want five rows and two columns in your table, drag down five squares and across two squares.

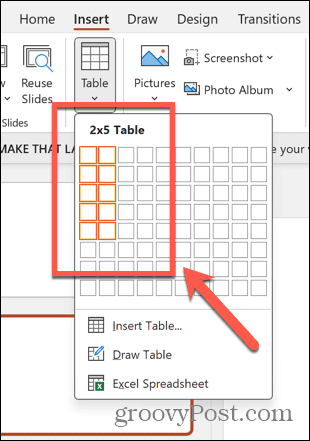
- Your table will look similar to the below example.


- Alternatively, click Insert Table.

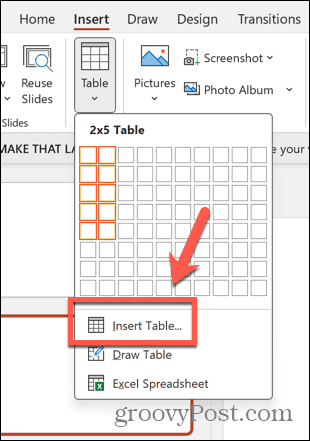
- Enter the number of rows and columns you want in the table.

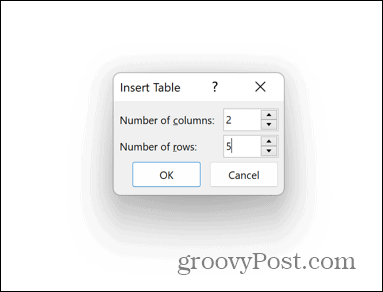
- Click OK and PowerPoint will create your table.
How to Add the Developer Tab to the PowerPoint Ribbon
Once you have a table, you can insert the checkbox. This is a great way to turn a potentially boring presentation that uses PowerPoint like a teleprompter into something more engaging and interactive.
There’s no checkbox option available by default. Therefore, you’ll need to manually add the Developer tab to your ribbon.
To add the Developer tab to the PowerPoint ribbon:
- Click the File menu.

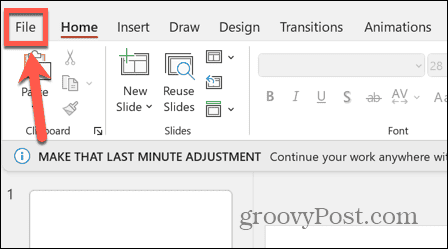
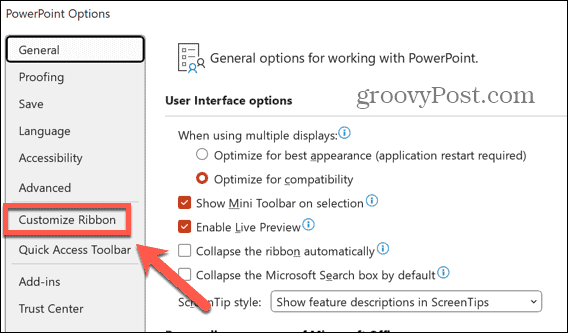
- At the bottom of the left sidebar menu, click Options.


- Select Customize Ribbon.

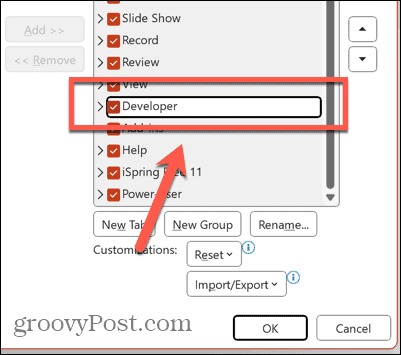
- Under Main Tabs, check Developer and then click OK.

How to Insert a Checkbox in a PowerPoint Table
Once the Developer tab is available, you can add checkboxes to your slides.
To insert a checkbox in a PowerPoint table:
- Click in the cell of the table where you want the checkbox to appear.
- Click the Developer menu.


- In the Controls section, select the Check Box icon.

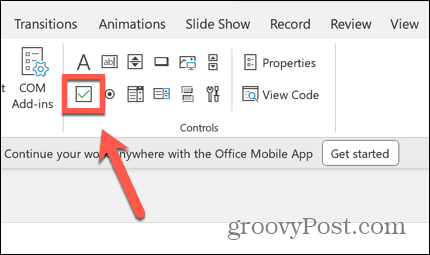
- Drag out the checkbox until it’s the size you want.


- Right-click the checkbox and select CheckBox Object > Edit.

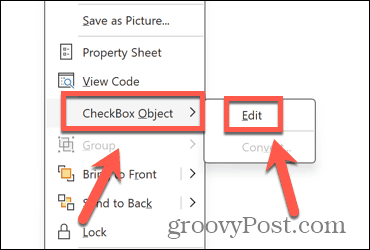
- Edit or delete the checkbox text.


- Click outside the checkbox to save your changes.
- To adjust the appearance of your checkbox, select it in your slide and click Properties.

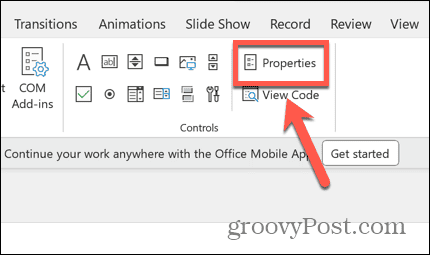
- You can change the font, color, background, and more to customize your checkbox.

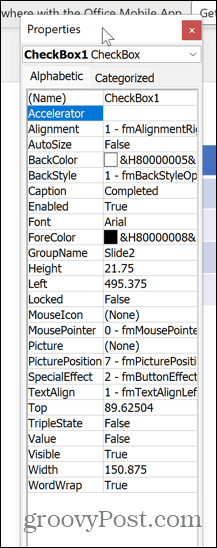
- When you’re done, close the Properties window.
- Your checkbox is now a clickable part of your presentation when you run your slideshow.


Unlock the Power of PowerPoint
Learning how to insert a checkbox in a PowerPoint table allows you to make your slideshow more interactive. You can check off items from your tables as you work through your presentation, giving a visual representation of your progress. This makes your presentations more interesting and impactful.
There is a whole lot of power under the hood in PowerPoint, with some incredible features that aren’t immediately obvious. These can help you create truly stunning presentations. One example is the Morph transition tool in PowerPoint. This tool can help you present stylish animated transitions in your presentations to really wow your audience.
Leave a Reply
Leave a Reply


