How to Extract the Year from a Date in Excel

Through the powerful features of Excel, learn how you can extract just the year from a date or series of dates.
Excel is a powerful productivity tool, letting you easily calculate just about any sort of data analysis you need. You can use it for budgeting, for creating timetables, or even as a contacts list complete with dates of birth.
What if you have many dates that you want to pull the years out of, though? With as powerful as Excel is, from performing simple calculations using formulas to generating helpful pie charts, it should come as no surprise that you can split the date apart and leave just the year. In fact, there are a few ways to do that, so let’s look at three ways to extract the year from a date in Excel.
How to Extract the Year from a Date in Excel Using the YEAR Function
First, you can extract the year from a date using a built-in function called YEAR(). Here’s how that works.
- In a blank cell in your spreadsheet, type =YEAR(A1). Replace A1 with the cell containing the entire date.

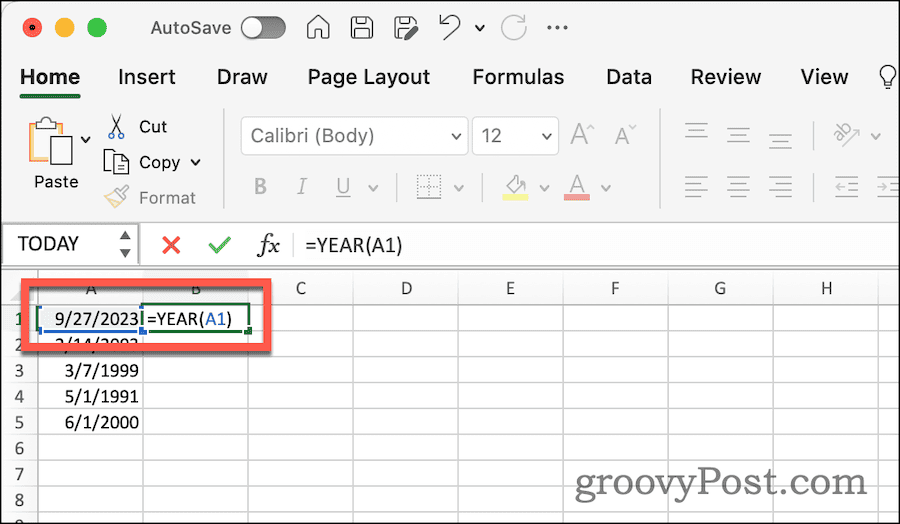
- Like magic, Excel fills in the cell with just the year from the selected date.

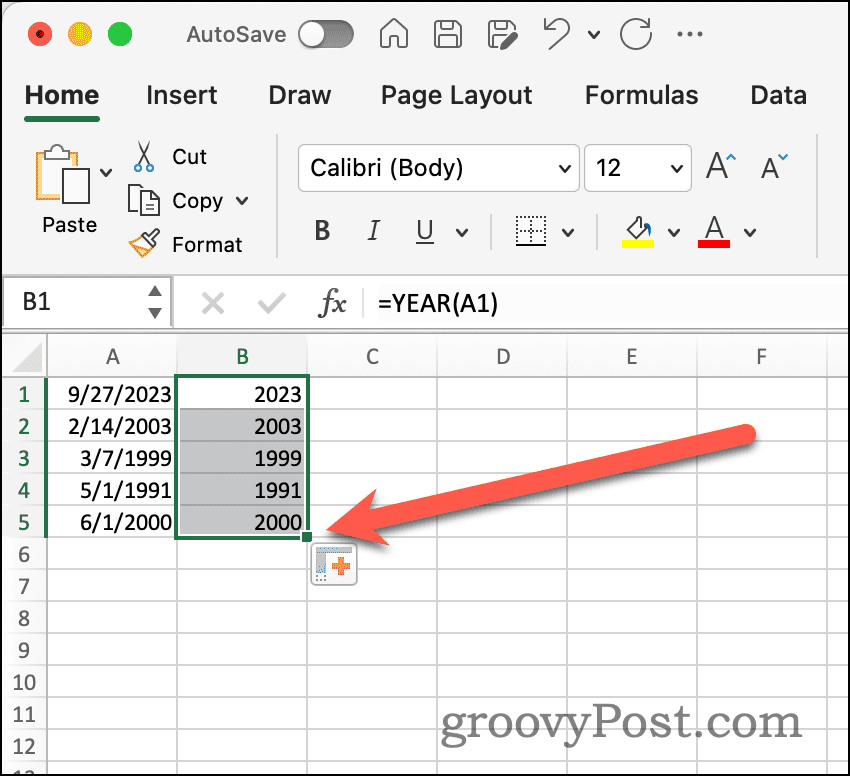
- If you have multiple cells you want to extract the date from, you can click the autofill handle of the cell and drag it down to include all of the cells you need to populate with years.
Using the TEXT Function to Extract the Year
Next, you can use the TEXT() function to pull out just the year.
- In an empty cell, type =TEXT(A1,”YYYY”). Again, replace A1 with the appropriate cell.

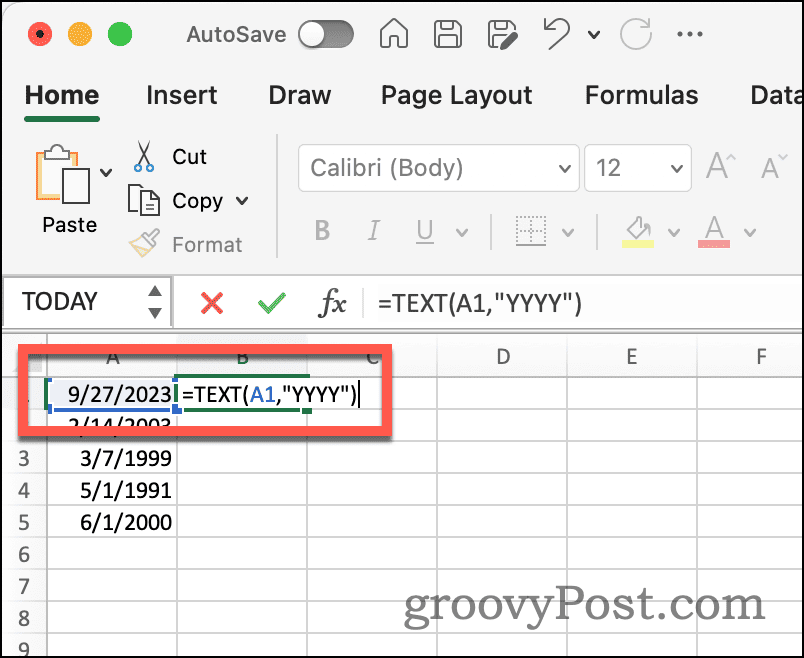
- If you only want a two-digit year, change the function to =TEXT(A1,”YY”) instead.

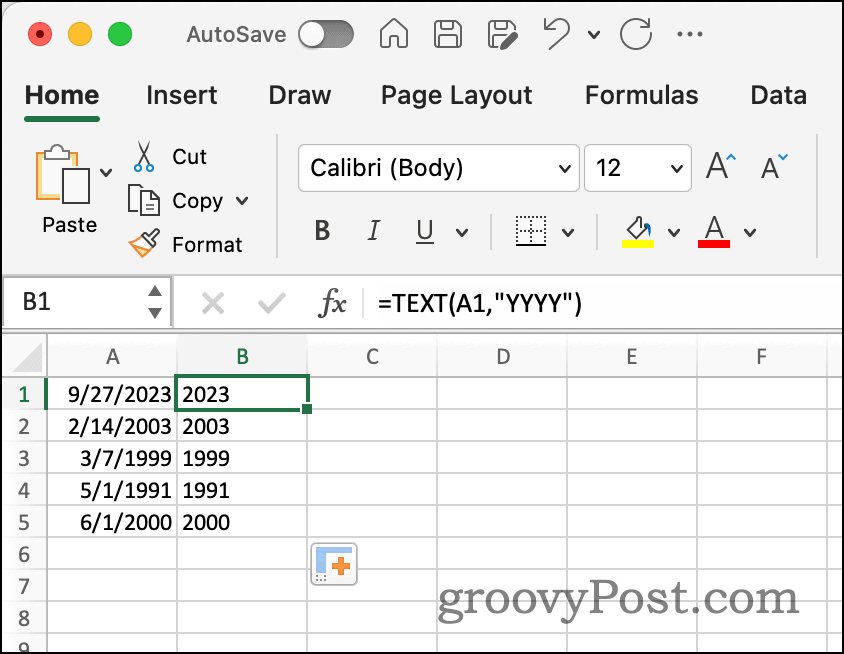
- As before, you can use the autofill handle to populate your formula to multiple cells.
Extracting the Year from a Date Using Data Features
Excel also includes a powerful tool that can split text in a cell into different columns. Using that feature, you can split your date apart into month, date, and year. Here’s how that works.
- Click the top of the column containing the dates.
- Next, click the Data ribbon.
- Click the Text to Columns button.


- In the next dialog box, make sure Delimted is selected, then click Next.

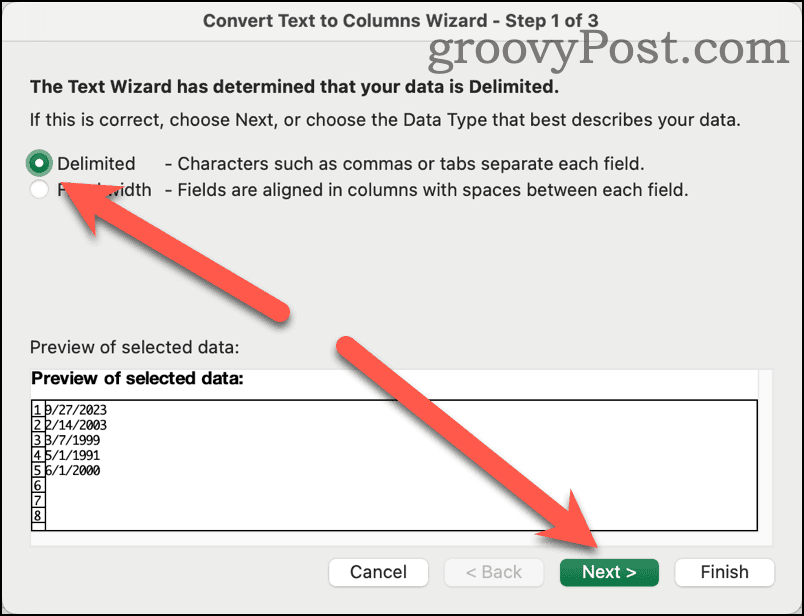
- Deselect Tab, and select Other.
- In the text box, enter the character separating the different parts of the date. In my example, it’s a slash (/).

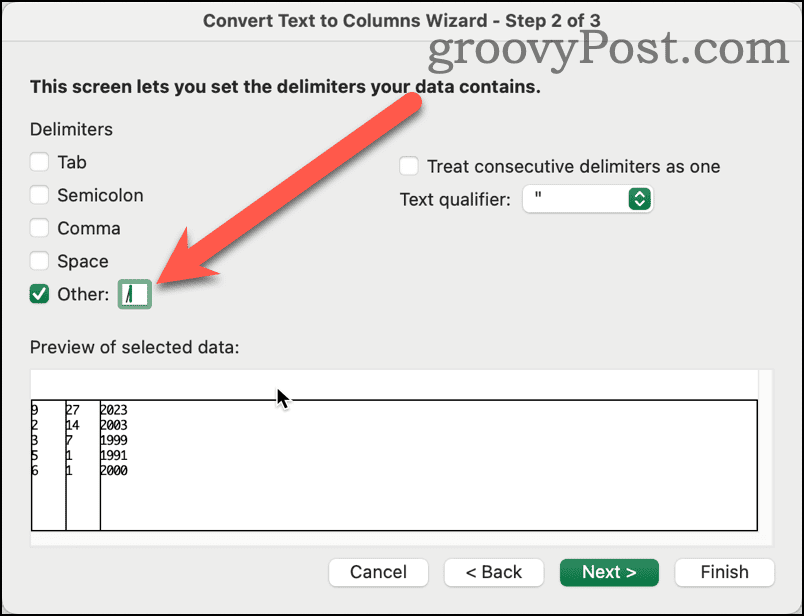
- The preview below shows the split. If all looks right, click Finish.

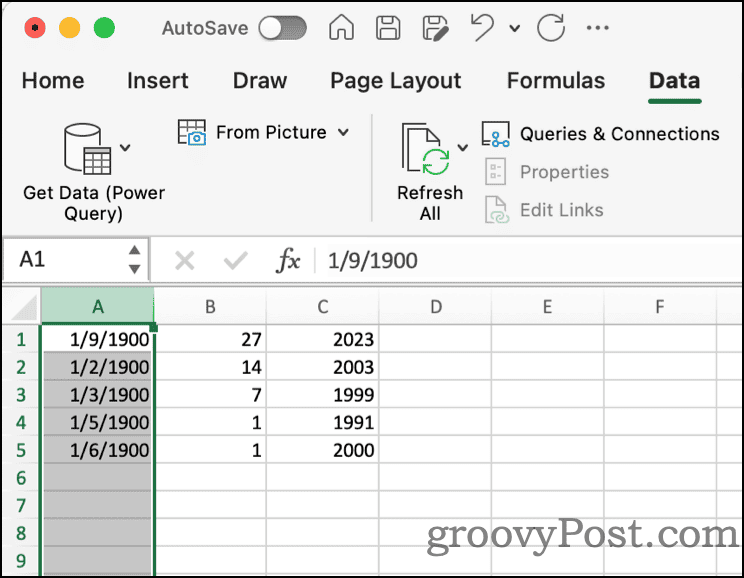
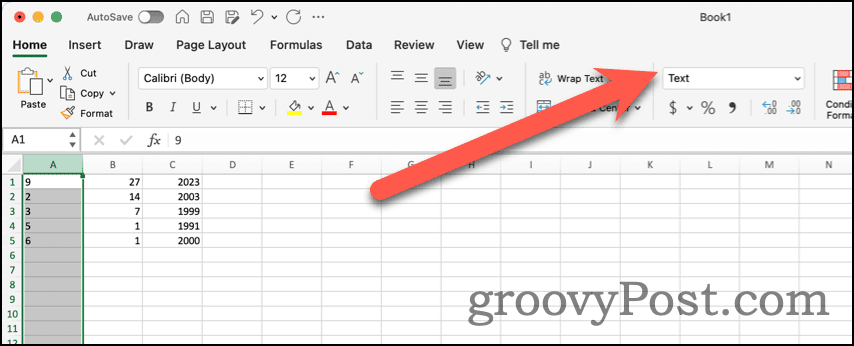
- You may be left with some cleanup to do. As you can see, the month column is still formatted as a full date. Click the Home ribbon and change the data type to General or Text.

Keep Learning the Powerful Features of Excel
I’ve been using Excel for going on 30 years, and it seems I always find new, powerful ways the spreadsheet software can help me stay productive. If you’re just getting started with Excel, we have a collection of tips everybody should know about, as well as more recent Excel tips you should check out.
Leave a Reply
Leave a Reply


