How to Add and Edit Tables in Google Slides

Adding a table to your Google Slides presentation is a good way to break down information in an easy-to-read format. This guide explains how.
Are you tired of cluttered, unorganized presentations in Google Slides that fail to effectively communicate your ideas?
If that’s the case, you’ll need to look at how the content of your presentation is presented. Too much text, for instance, can be difficult for your audience to follow. An excellent way to break this down is to use tables, especially for statistics and mathematical data.
Google Slides allows you to add tables to your presentation to do just that. If you want to know how to add and edit tables in Google Slides, follow the steps below.
How to Add a Table in Google Slides
Google Slides allows you to create tables to present your content. You can do this using the tools built-in to Google Slides.
To add a table in Google Slides:
- Open an existing Google Slides presentation.
- Alternatively, create a new presentation to work from.
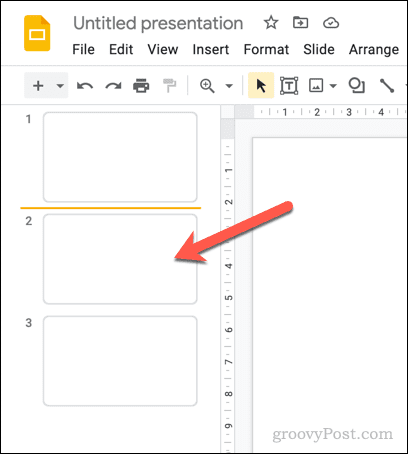
- Select the slide where you want to place the table.

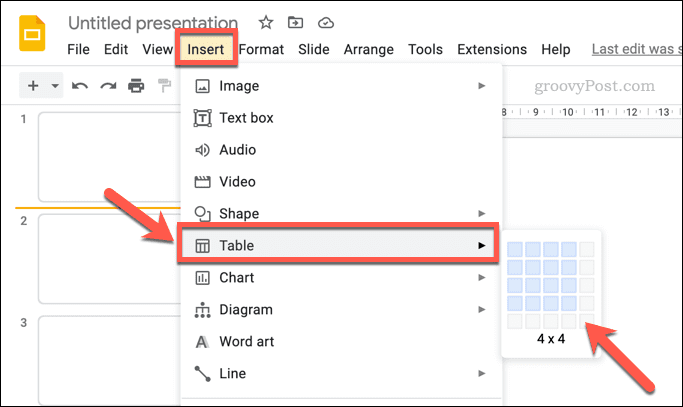
- Go to Insert > Table.
- A pop-up menu appears to help you determine the table size based on the number of segments. Using your mouse, hover over the segment using the on-screen guide (e.g., 4×4).
- With your mouse hovering over your selected size, click to confirm it and insert it into your slide.

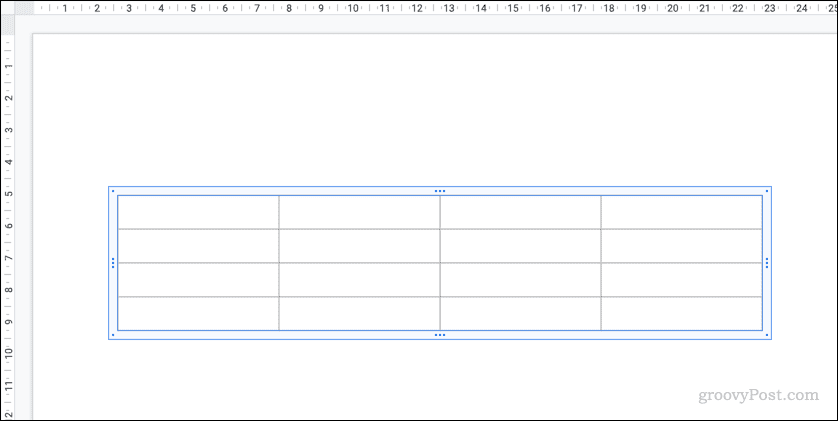
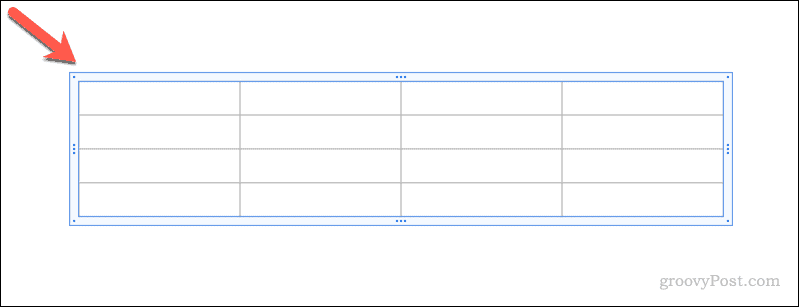
- At this point, Google Slides will insert your new table onto your slide. You can then add your text or other content to it, move and resize it, and more.

You can copy and paste content from Google Sheets if you’d prefer. When this is pasted into your Google Slides presentation, the spreadsheet content is converted into a table to maintain its formatting.
How to Edit a Table in Google Slides
With your table inserted, you can edit it further to suit your requirements. For example, you can change some of the table’s formatting settings (such as the size and position of the table) using the Format options side menu.
Other settings, such as text formatting and color within the table, can be adjusted using the Formatting tools on the top menu.
To edit a table in Google Slides:
- Open your Google Slides presentation.
- Select the slide that contains the table.
- Click on the table to make it active for editing.

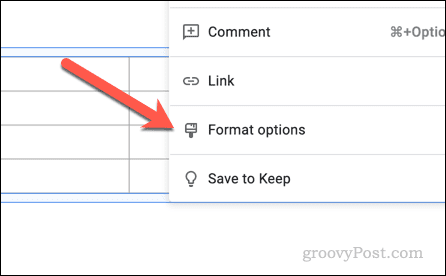
- When clicked, the Format options menu will appear on the right. If it doesn’t, right-click the table and select Format options.

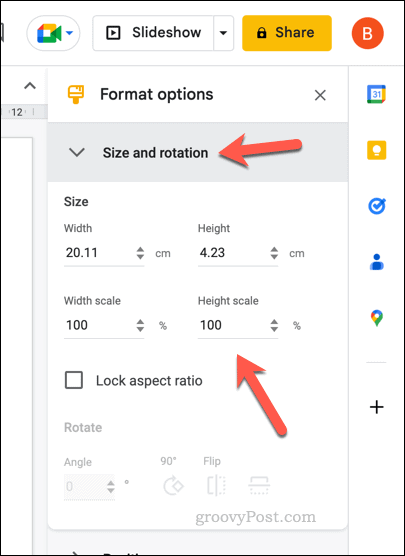
- To change the table size, click the Size and rotation section to open it, then change the Width and Height values.

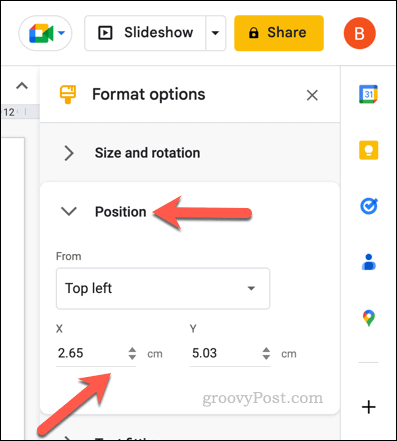
- To change the position of the table, click the Position section and change the X and Y values. Select the From value (either Top Left or Center) you’d prefer to use to guide you.

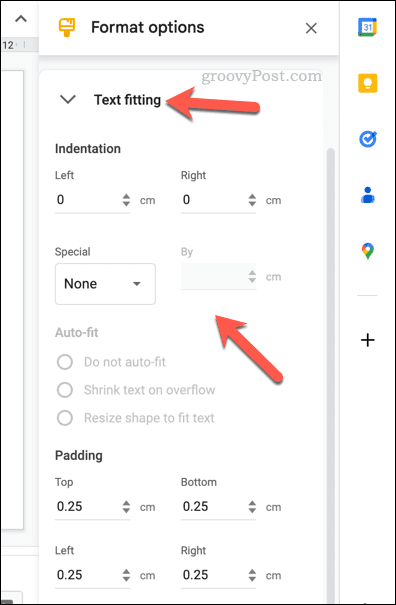
- To alter other text settings, such as text indentation, open the Text fitting section and change the values listed there.

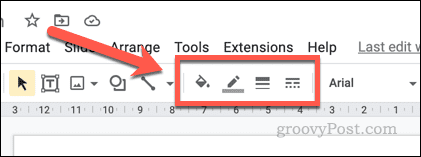
- If you want to format your table’s text, select the text in the table and use the Formatting tools (such as text color, emphasis, font and font size, etc.) on the top menu bar.

- To add a border to your table, click the border weight icon on the menu bar and select the size.
- If you want to change the border dash styling, click the border dash icon and select what style you wish to use.
- To change the table border color or the table fill color, select the fill color and border color icons and make the necessary changes.


Any changes you make to your table will apply immediately. However, if you decide to change the presentation theme, some settings (such as table color and border) might be changed again to suit the theme.
How to Delete a Table in Google Slides
If you’ve decided that a table isn’t suitable for your presentation, you can remove it. Deleting a table will delete all of the text and other content held within it.
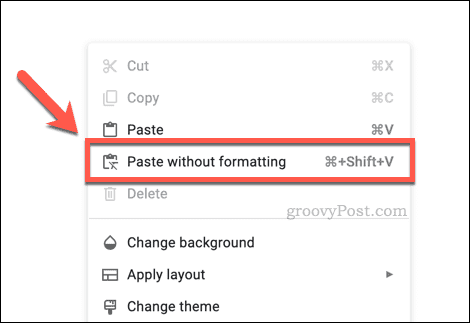
If you want to save any of this content, you’ll need to copy the table first, then right-click on and select Paste without formatting. This will create a single text box that contains the text that was held within the table originally. You can then move this content elsewhere.
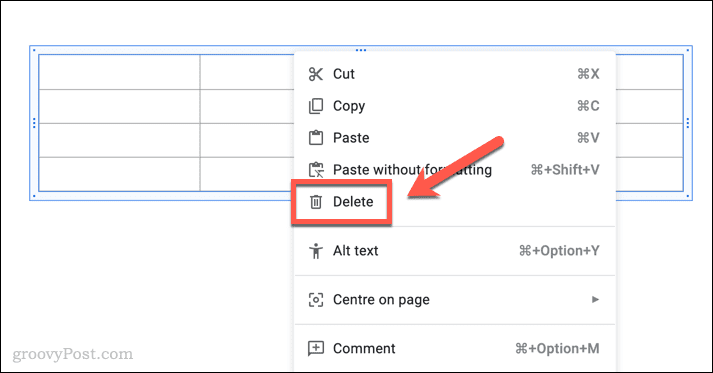
When you’re ready to delete a table in Google Slides, open your presentation and select the slide that contains the table. Next, select the table and press the Delete key on your keyboard.
Alternatively, right-click the border of the table and select Delete from the menu.
If you want to restore the table, press the Undo button on the menu bar immediately after deleting it. Alternatively, press Ctrl + Z (on Windows) or Command + Z (on Mac) to undo the deletion instead.
Using Google Slides to Create Powerful Presentations
If you want to make your Google Slides presentations better, you’ll need to make the information you’re presenting easy to follow. Adding tables to your Google Slides presentation allows you to take tricky figures and text snippets and make them easy to read instead.
You could also print your Google Slides presentation with notes attached for your audience to take away with them. Don’t forget to consider adding other forms of content, such as GIFs, audio, and YouTube videos.
Want to switch from PowerPoint? You can quickly convert PowerPoint presentations to Google Slides using the import tool when creating a new document.
Rod
April 8, 2023 at 8:32 am
One step is missing in changing the default font in Google Docs. Once you make the change as you described, then go down to “options” and click “save as my default styles.” Without that step the new default font won’t kick in.
jackie
April 19, 2023 at 3:22 pm
was just writing the same! to clarify, find Options in Format > Paragraph styles > Options