How to Trim Videos With VLC for Clips

If you need a quick way to trim sections of your videos and create clips, you can use VLC. We’ll show you how to trim videos with VLC in this guide.
In addition to playing virtually any media file you can throw at it, VLC Media Player is packed with features you’re probably not using. For example, you can use VLC to edit videos and make clips.
When it comes to editing videos, something you may want to do is trim videos. This allows you to only keep the parts of a video that you actually need. VLC includes the ability to trim your videos by cutting them into short clips. You might use these clips in a presentation or post them on social media, for instance.
Whatever you need it for, we’ll show you how to trim videos with VLC Media Player for clips below.
How to Trim a Video in VLC Media Player
Trimming a video with VLC is basically recording only the part of the video that you want. After recording the section you want, you can save it to a specific location on your PC.
To trim a video in VLC Media Player, follow these steps.
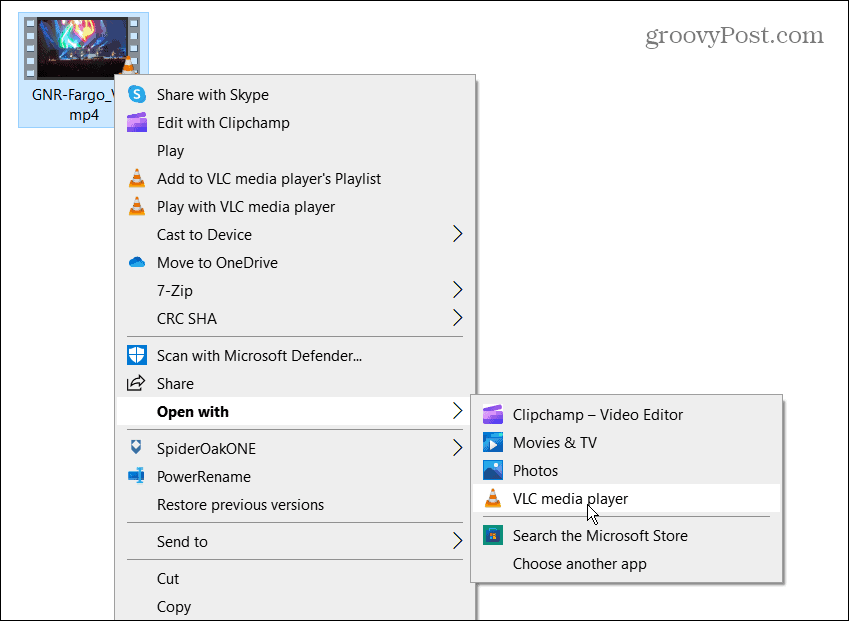
- Open the video you want to trim with VLC Media Player.

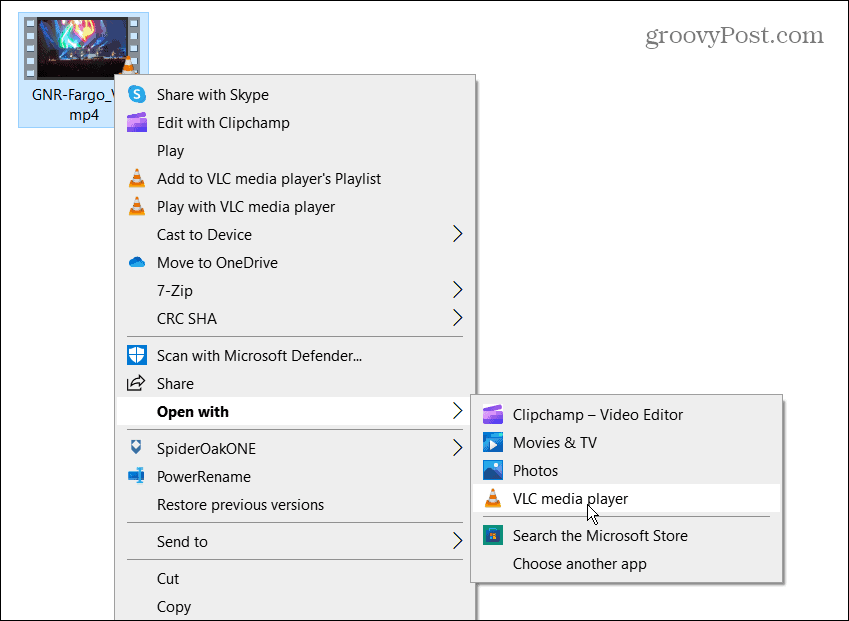
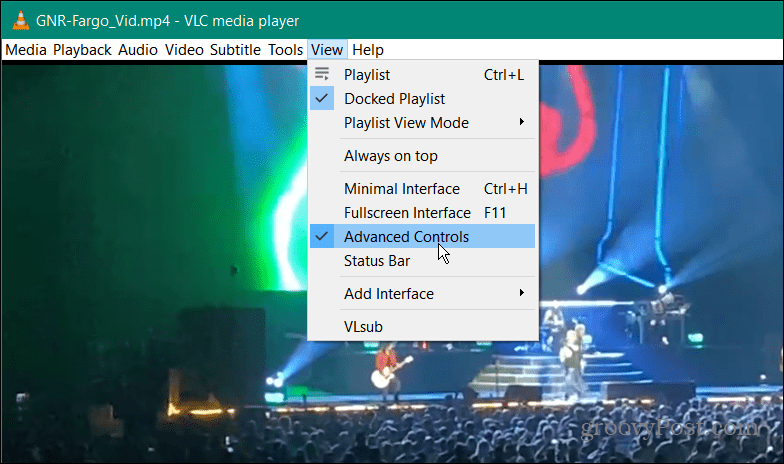
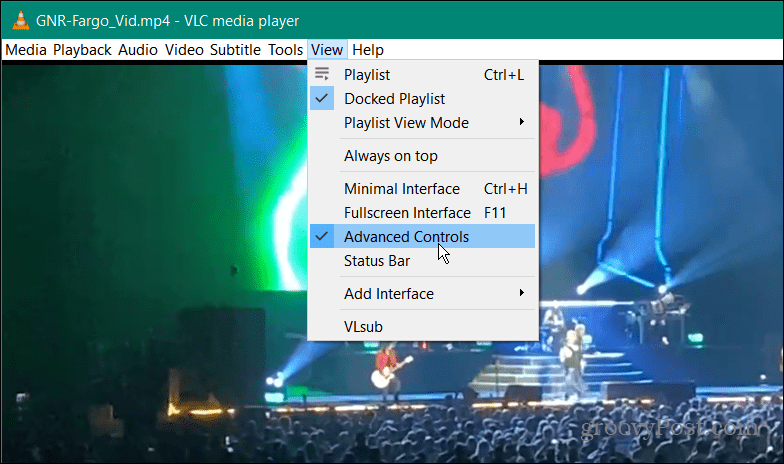
- Press View > Advanced Controls from the toolbar on the top.

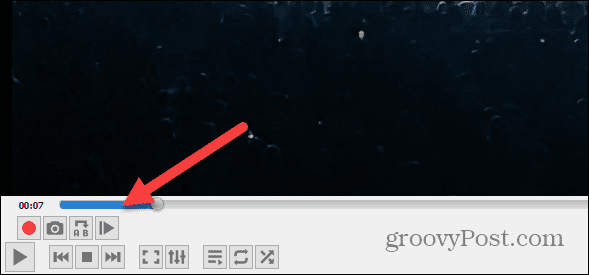
- The advanced controls menu will display in the lower-left corner of VLC.

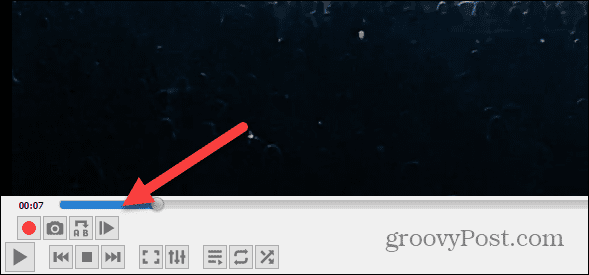
- Start playing the video and move the slider to the section of the video you want to keep.


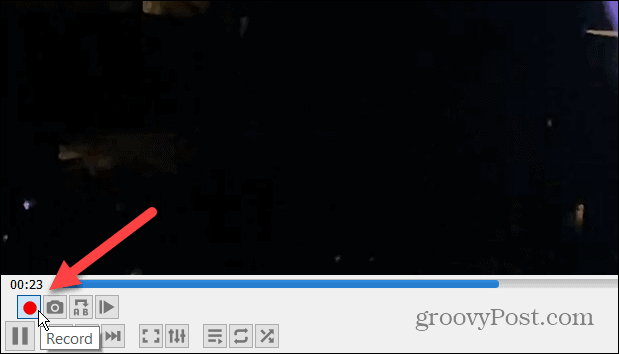
- Now, from the advanced controls section, click the red Record button.

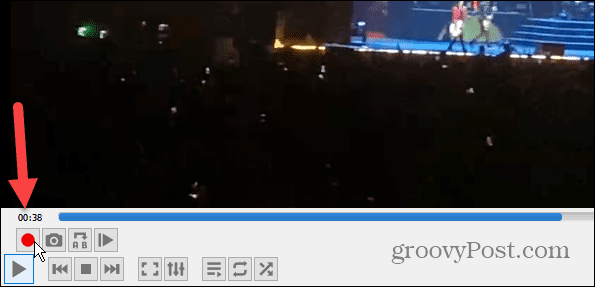
- Wait while the section of the video you want gets to the spot you want, and tap the Record button again.

How to Find Cut Videos in VLC
After you’re done recording only the section of the video you want, you’ll need to find the cut video files. To find your cut videos in VLC, follow these steps.
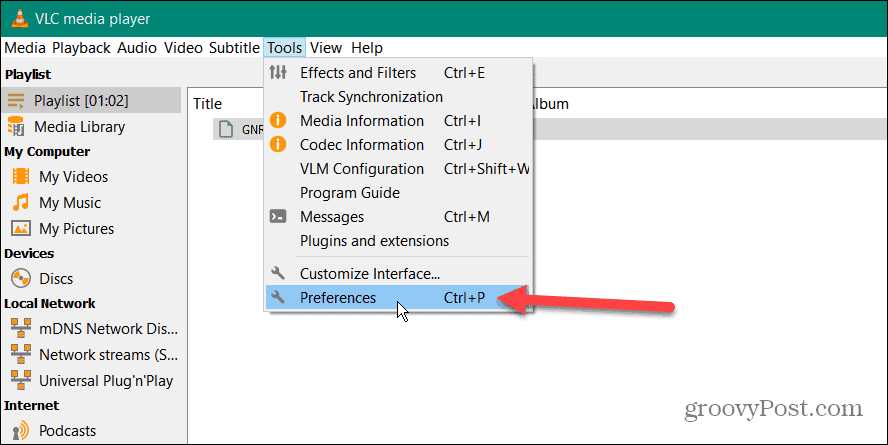
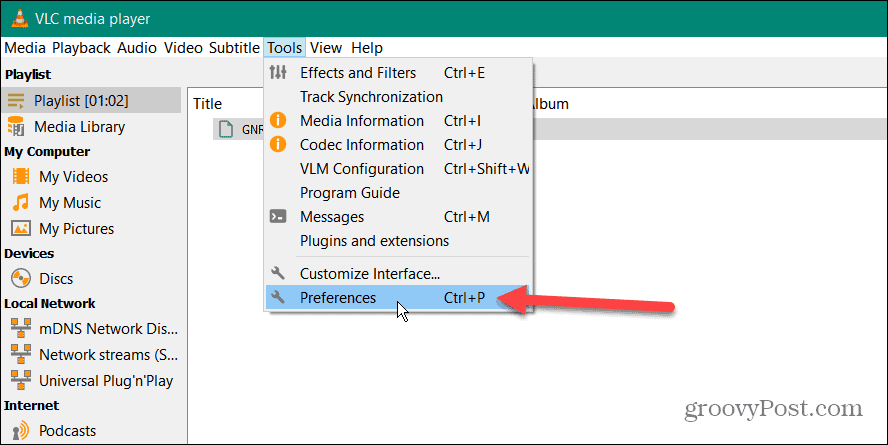
- With VLC open, navigate to Tools > Preferences from the toolbar.

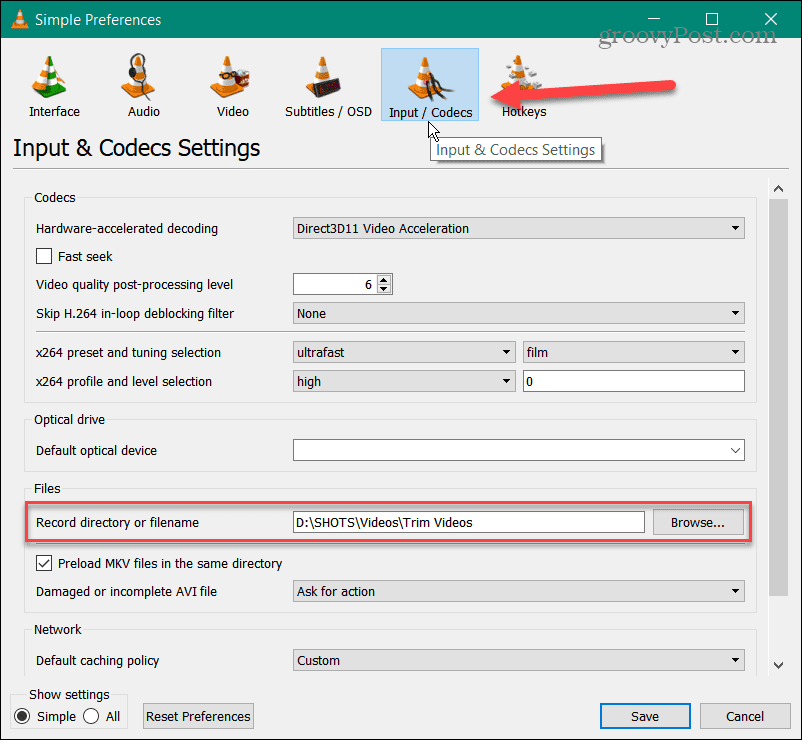
- Select Input / Codecs from the top and look in the field next to Record directory or filename to find the path where your videos reside
- You can change the path if you want them somewhere else or if a path doesn’t exist. To do this, click the Browse button and choose your new location using File Explorer.

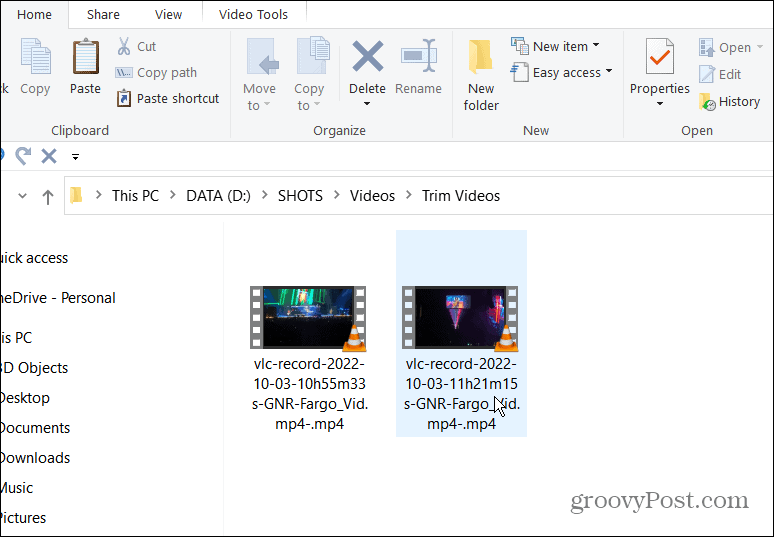
- Now you can access your trimmed videos and use them for the project you need them for.

Trimming Videos with VLC
Using VLC to trim a video into smaller, specific sections and create clips is straightforward using the steps above. However, if you’re going to perform complex video editing, you’ll want to use something like Microsoft’s Clipchamp or TechSmith’s Camtasia.
As we mentioned, VLC Media Player isn’t just for watching videos. It includes other useful features, allowing you to move a video frame-by-frame (perfect for screenshots) and rotate videos, among others.
You can also use VLC to convert video files to MP3 or record your desktop screen. You can even use VLC to record your webcam.
Leave a Reply
Leave a Reply

