How to Remove a Microsoft Account from Windows 11

If you no longer want to use a Microsoft account, you can remove a Microsoft account from Windows 11 and switch to a local user instead. Here’s how.
There are several advantages to logging into a Windows 11 PC with a Microsoft account. A Microsoft account allows you to sync your files and profile settings between different PCs, for example.
That doesn’t mean that they’re perfect. You’re trusting Microsoft with a lot of data, and if you prefer your privacy, you may want to revert to using a local account. If you’re letting somebody else use your PC, switching to a local account is probably a safer option.
Whatever the reason, here’s a look at how you can remove a Microsoft account from Windows 11.
How to Remove a Microsoft Account from Windows 11
Microsoft accounts are tied to your PC. However, if you don’t need or want that arrangement with Microsoft, you can remove your account.
Note: To remove a Microsoft account, you’ll need to create a local user account with admin privileges first.
To remove your Microsoft account from Windows 11, use the following steps:
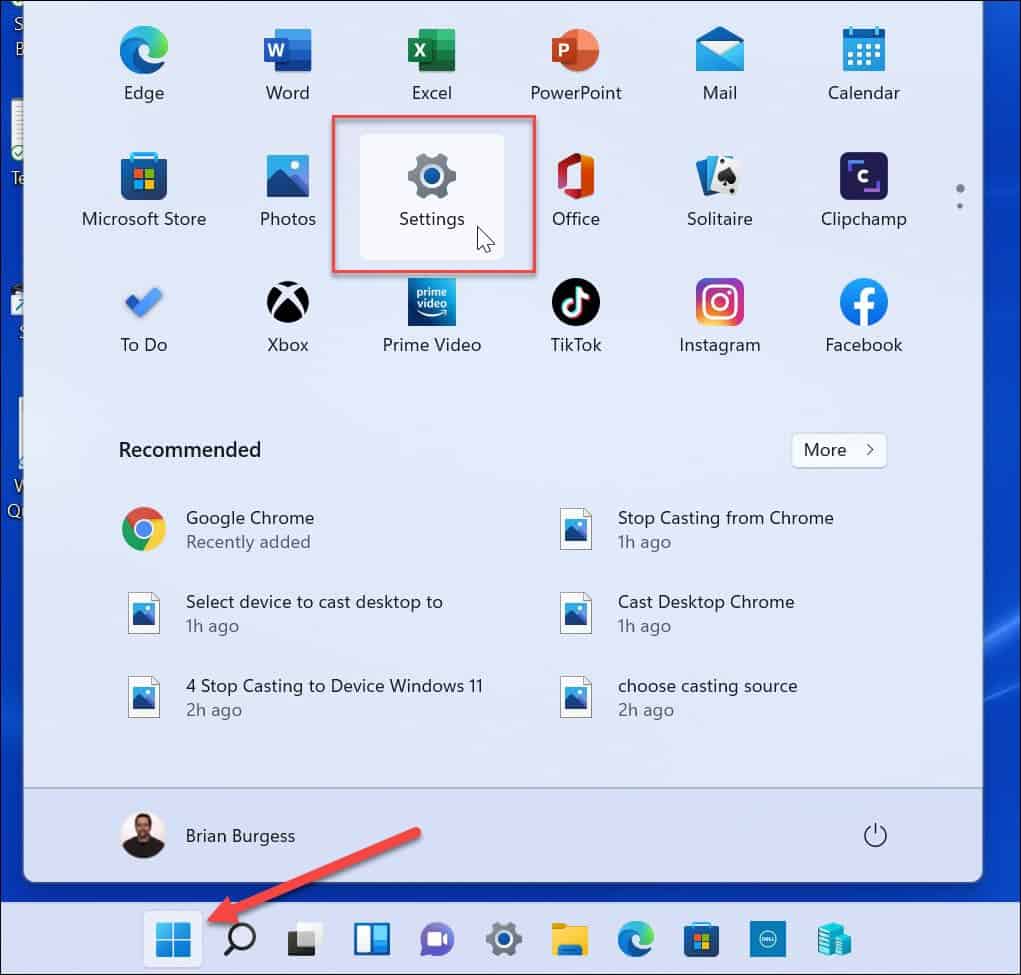
- Press Start and select Settings from the menu. Alternately, use the keyboard shortcut Windows key + I to open Settings directly.
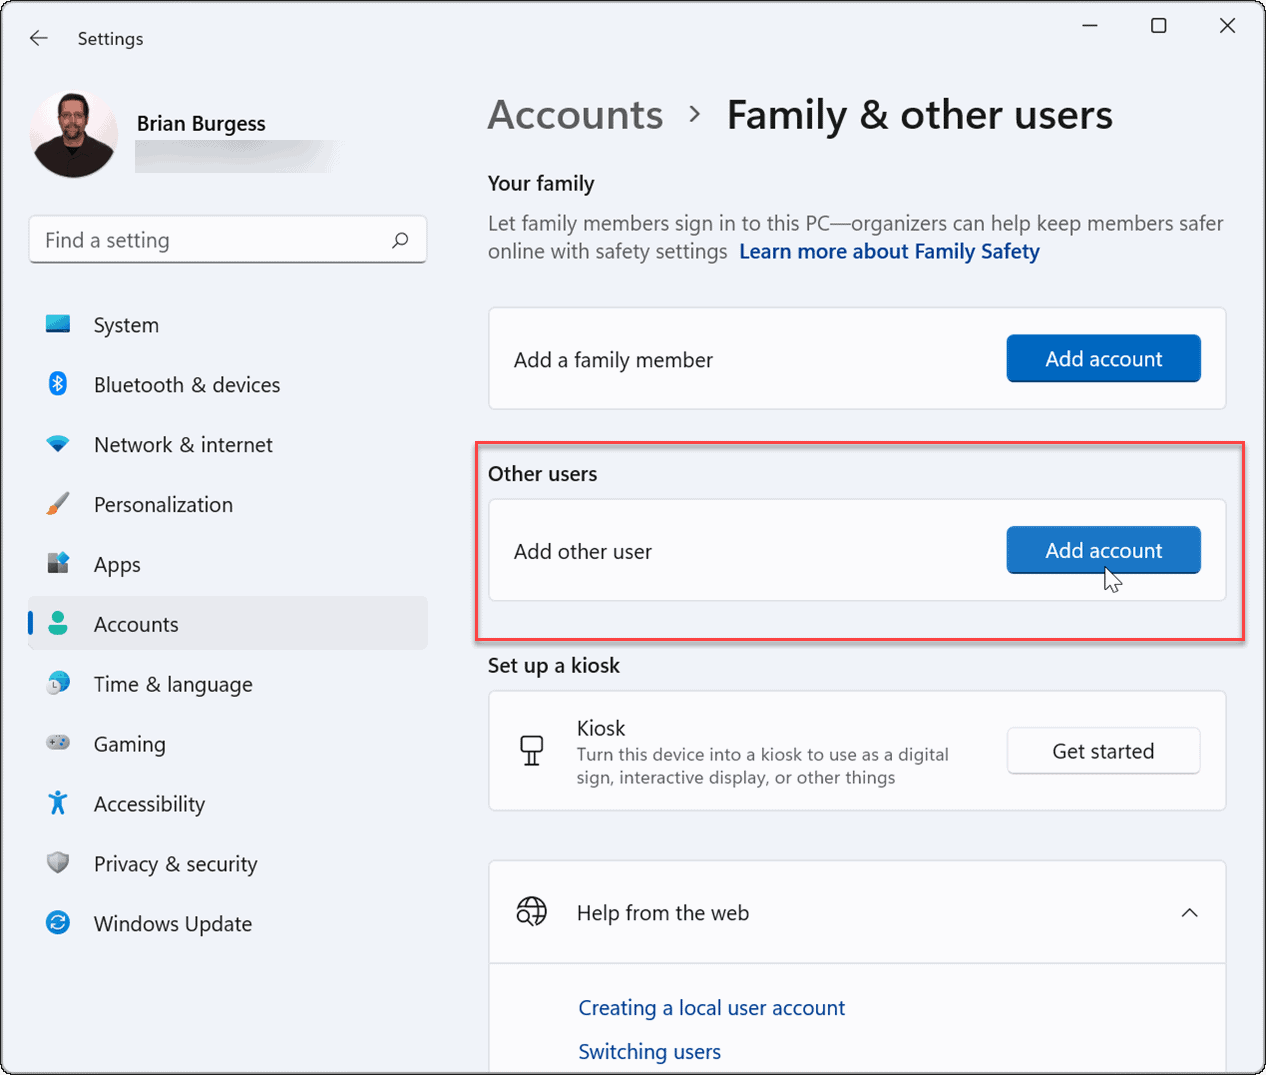
- The next step is to add a local account with admin privileges. When Settings opens, click Accounts from the left panel and then Family & other users from the right.

- Next, click the Add account button under the Other users section to add another user.
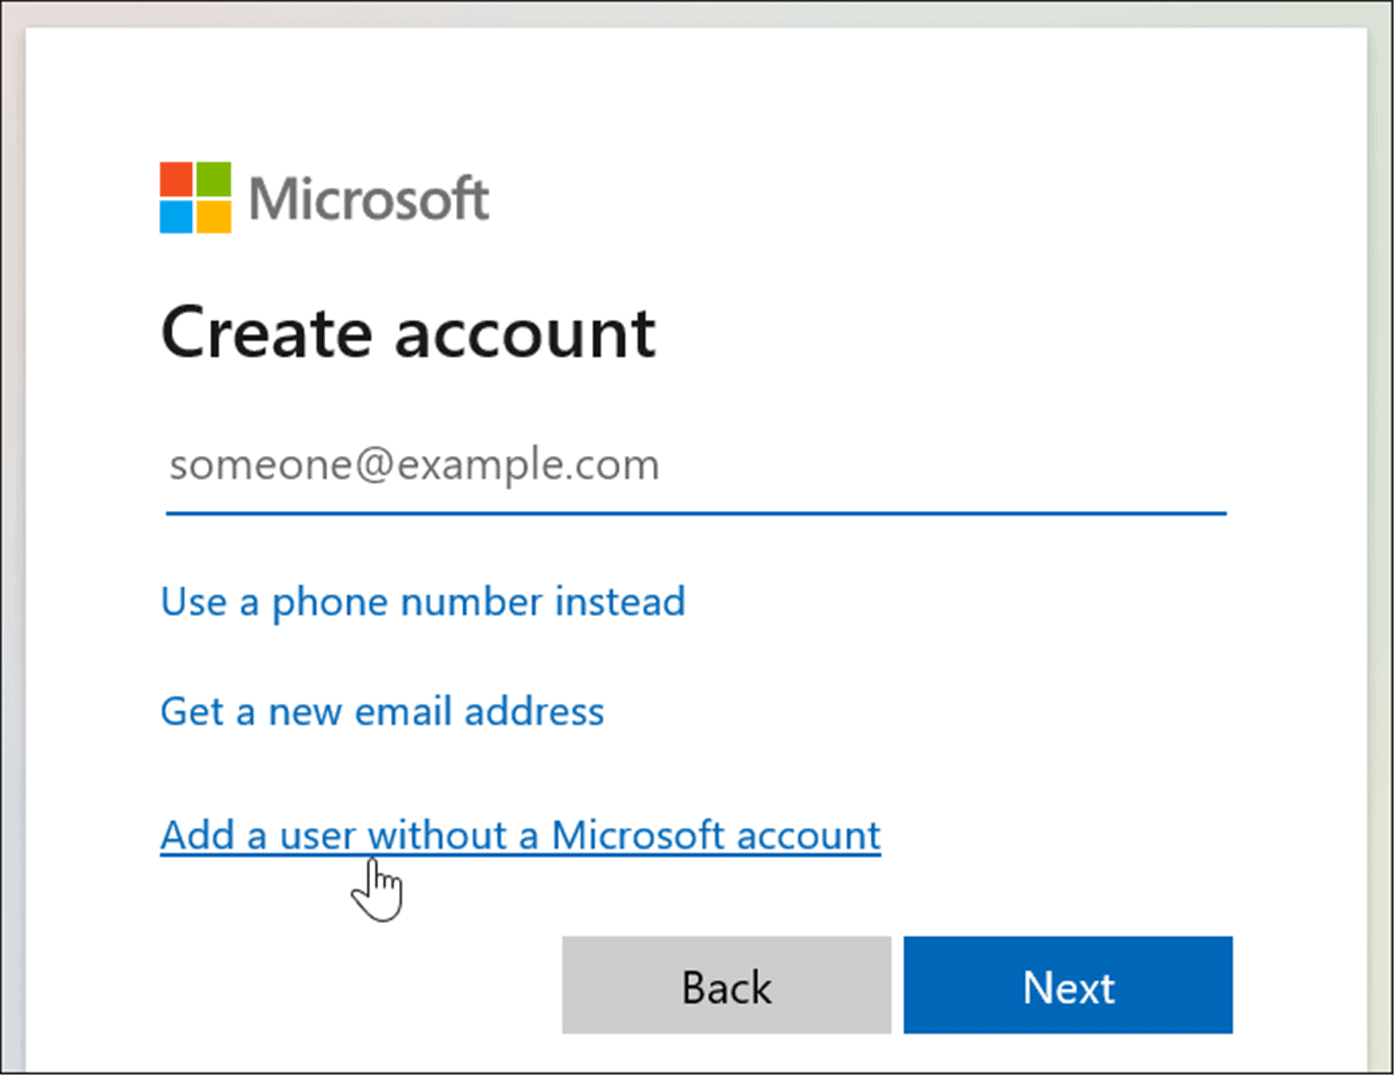
- When the Microsoft sign-in screen appears, click the I don’t have this person’s sign-in information link and click Next.

- Click the Add a user without a Microsoft account link on the following screen and click Next.
- When prompted, type in a user name and password and click Next.

How to Set a Local User Account as an Administrator on Windows 11
Creating a local account is a necessary step in removing a Microsoft account from Windows 11. You’ll also need to give the new local user account admin privileges to ensure you have full, unrestricted access to your PC using it.
To set a local user account as an administrator on Windows 11, use the following steps:
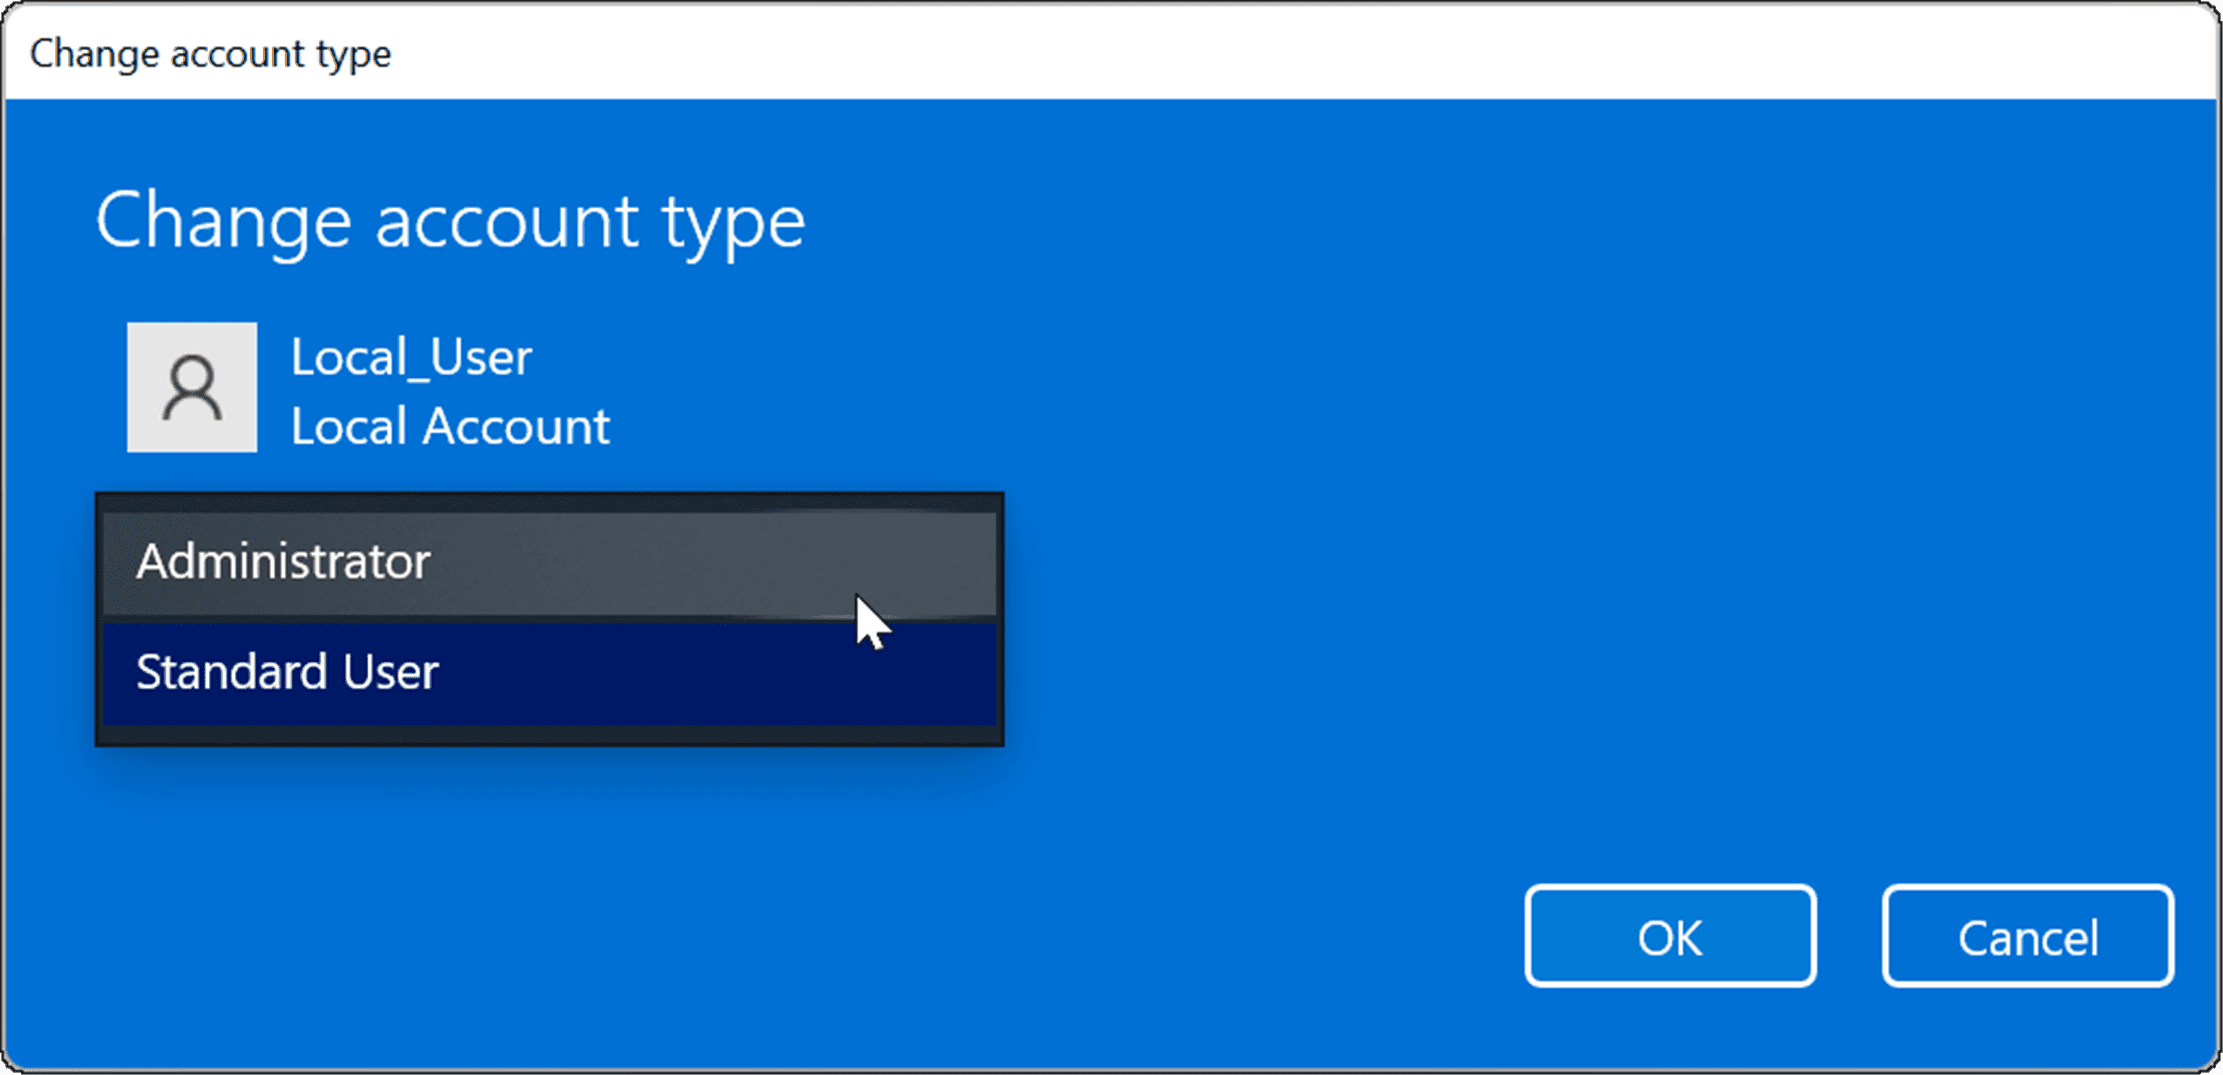
- Go to Start > Settings > Accounts, click the local user you created, and then select the Change account type button.

- From the dropdown menu under Account type, select Administrator, and then click OK.

- Log out of the Microsoft account and log back in with the local administrator account.
How to Delete a Microsoft Account on Windows 11
Now that you have a local account set up with administrator access, you can remove the Microsoft account(s). This will remove the account from your PC, but you’ll still be able to sign in to it elsewhere.
To delete the Microsoft account from your Windows 11 machine, follow these steps:
- Open Start > Settings > Accounts and click on Family & other users.

- Under the Other users section, select the Microsoft account you no longer need, then click the Remove button.
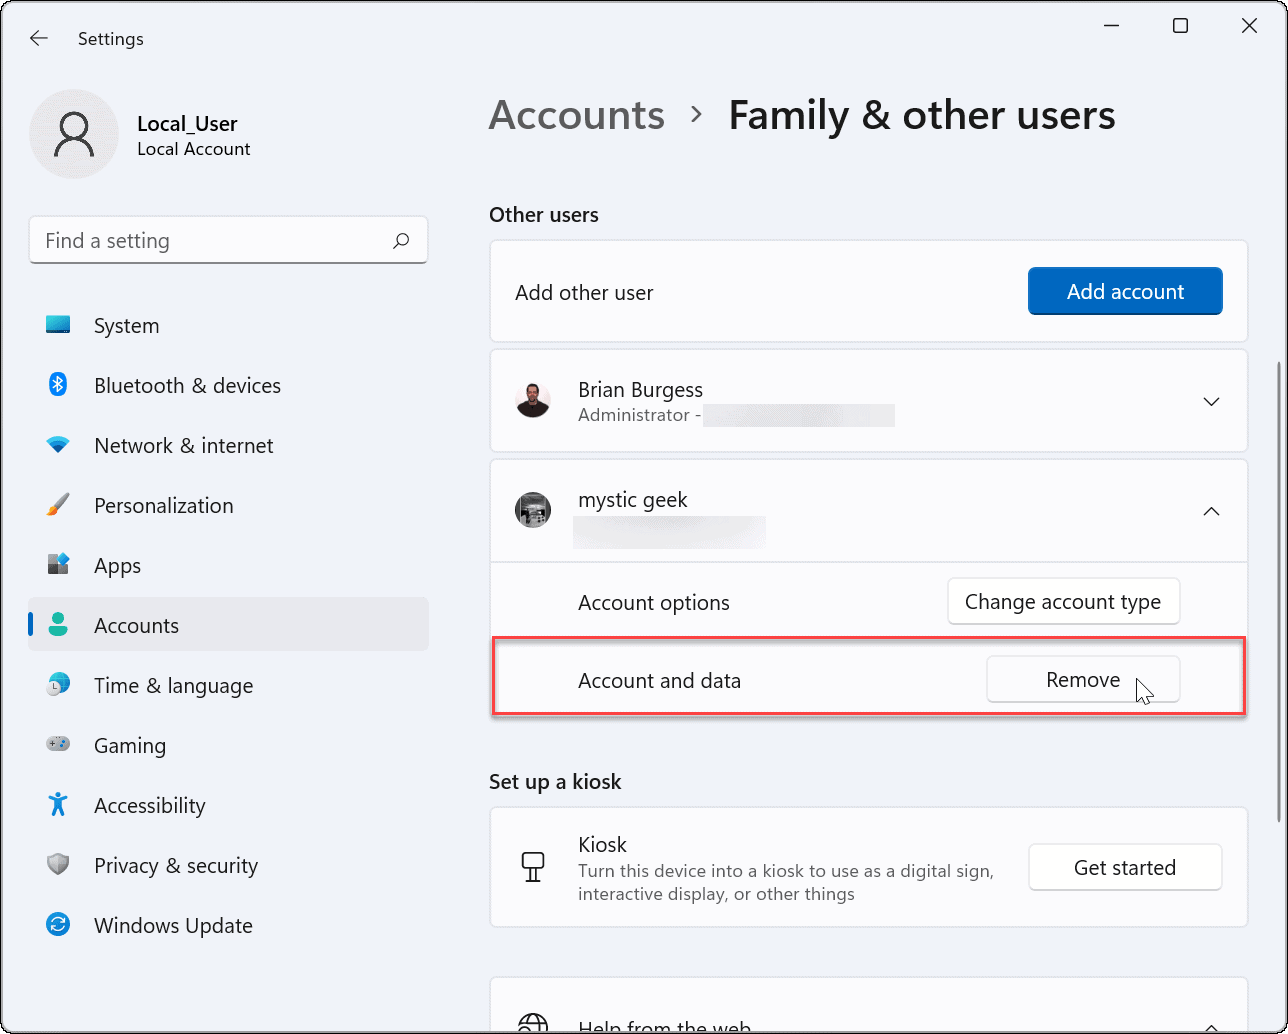
- Next, click on the Delete account and data button when the confirmation screen appears.

By confirming the deletion, the Microsoft account and its data are removed, and it will no longer appear on the sign-in screen. If you need it back for any reason, you can always add a new user on Windows 11.
How to Delete a Microsoft Account Using Control Panel
You can still remove a Microsoft account via Control Panel on Windows 11 (for as long as the Control Panel remains available). However, using this method still requires you to be logged in as a local user with administrator access.
To remove a Microsoft account through the Control Panel, use these steps:
- Click the Start button or press the Windows key, type CPL, and select the top result.

- When Control Panel opens, click on User Accounts.

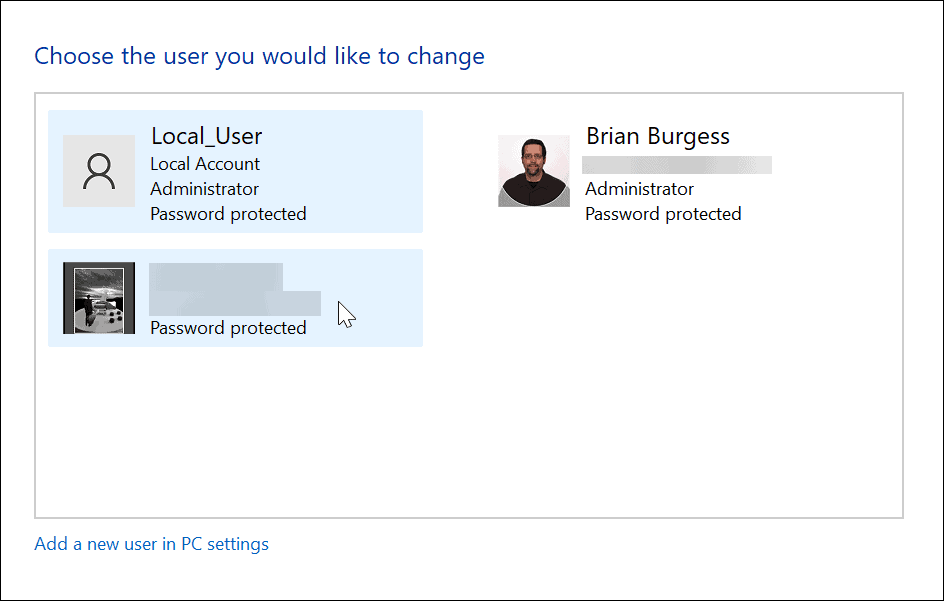
- Next, click on the Manage another account option.

- Select the Microsoft account you want to delete from the list.
- In the Delete Account menu, click the Delete files button.

- Finally, click the Delete Account button to remove the account.
That will delete and remove the Microsoft account from your PC, and it will no longer appear on the sign-in screen.
Preparing Windows 11 User Accounts
The steps above will help you to remove a Microsoft account from a Windows 11 PC.
If you have a busy household or it’s just the two of you, adding another user account on Windows 11 can be helpful. Each user will have their own profile to customize their Windows experience without affecting other profiles.
It’s also worth mentioning that you can change your account name on Windows 11. In addition to changing the account name, you can also change your account picture on Windows 11. If you’re tired of clicking Yes all the time when making a system change, you can also disable User Account Control prompts on Windows 11.