How to Use Hide My Email in iCloud+

Hide My Email is a new feature for iPhone, iPad, and Mac. It lets you use a randomly created email instead of your own to thwart marketers and scammers.
Apple’s iCloud Plus is one of the newest features in iOS 15, iPadOS 15, and macOS. For paid iCloud account holders only, iCloud Plus offers several new features, including “Hide My Email,” “Private Relay,” and custom email domains. In addition, a HomeKit Secure Video feature is also available for those with equipment to support it. In this article, you’ll learn more about the Hide My Email feature and how it works.
What is Hide My Email?
When you use your email online to make purchases, it’s possible that your email address is being sold to marketers, who then sell it to other marketers, and so forth. To combat these folks and scammers alike, “Hide My Email” lets you use temporary Apple email addresses. Messages sent to these addresses are automatically sent to your primary email address.
There are two ways to use “Hide My Email.” First, Sign in with Apple lets you create an account using a randomly generated email address inside a supported third-party app or website. You can also make one of these emails in iCloud Plus, in Safari, or on iCloud.com.
Hide My Email is ideally suited for those times when you’re asked to fill out an online form or sign up for a newsletter. Then, when you’re tired of receiving promotional material from that email, delete it and go about your day.
Regarding “Hide My Email,” Apple explains:
“Apple doesn’t read or process any of the content in the email messages that pass through ‘Hide My Email,’ except to perform standard spam filtering that’s required to maintain our status as a trusted email provider. All email messages are deleted from our relay servers after they’re delivered to you, usually within seconds.”
Creating a Hide My Email Address
Here’s a look at how to create a temporary Apple email address through the “Hide My Email” feature.
Sign In With Apple
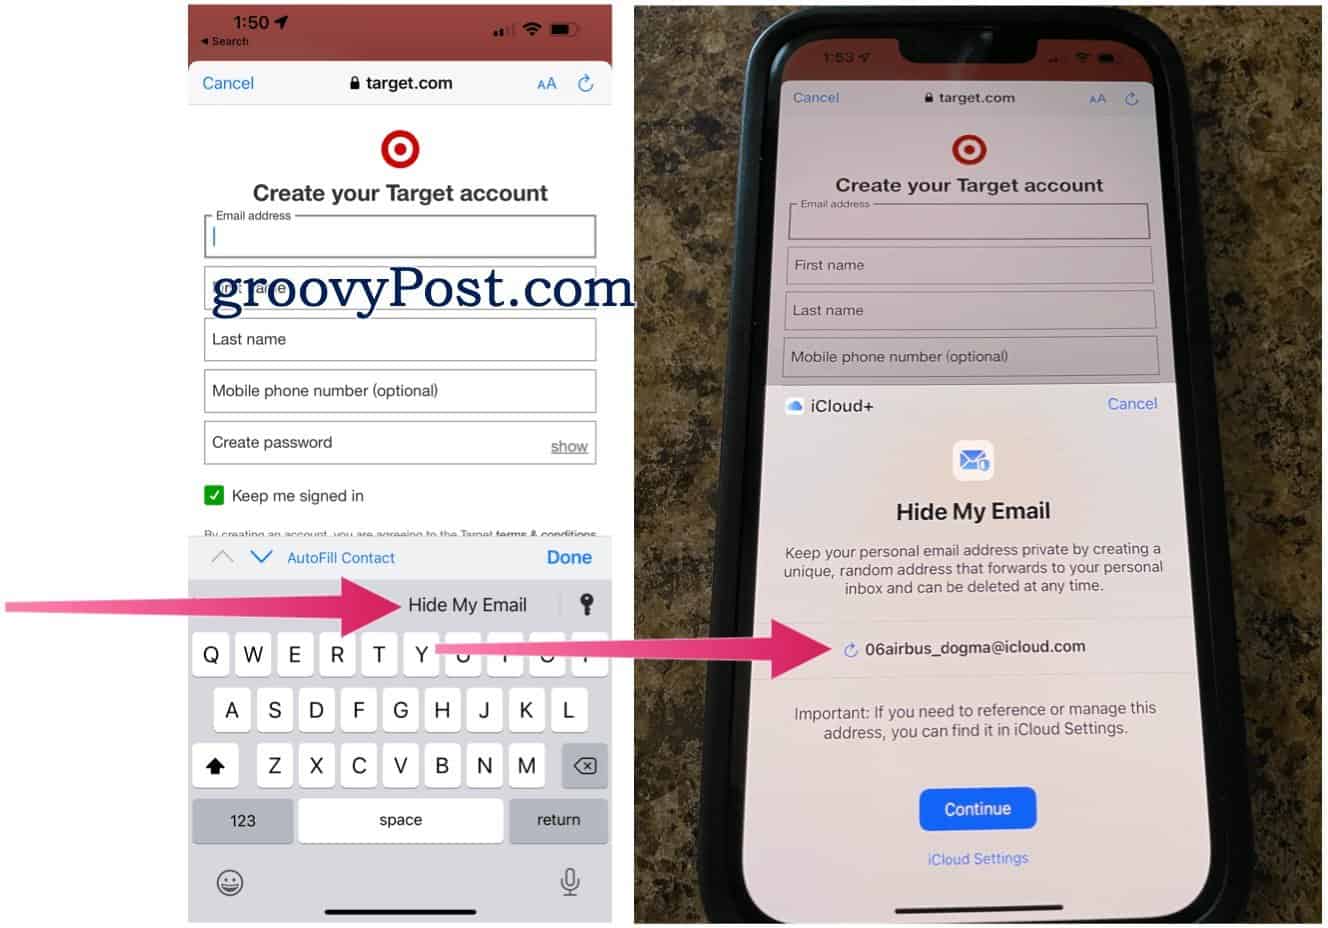
Perhaps the easiest way to generate a new email is through Sign In With Apple through an app or website. In the following example, we’re creating an email in the official Target app. To get started:
- Place your cursor inside an email box within the app. On a registration page, for example.
- Tap Hide My Email, which should be above the keyboard.
- Choose to Continue (or Use) on the “Hide My Email” pop-up. If you don’t like the randomly generated email, click the refresh button to the left of the email chosen. Then, use the email just like you would any other on the form.
Through Safari, the procedure is similar. In the following example, we’re signing for an account at B&H Photos:
- Move your cursor inside an email box in an online form.
- Tap Hide My Email.
- Choose Continue/Use, then use the address in the online form.

iCloud Plus
You can also generate email addresses using iCloud Plus. On iPhone or iPad:
- Tap the Settings app on the device’s Home screen.
- Choose your name at the top.
- Select iCloud.
- Tap Hide My Email.
- Select Create New Address.
- Make a note of the address; tap Use Different Address if necessary, then label the address. Add a message if needed.
- Choose Next.
- Tap Done. Your new email address is ready for use!

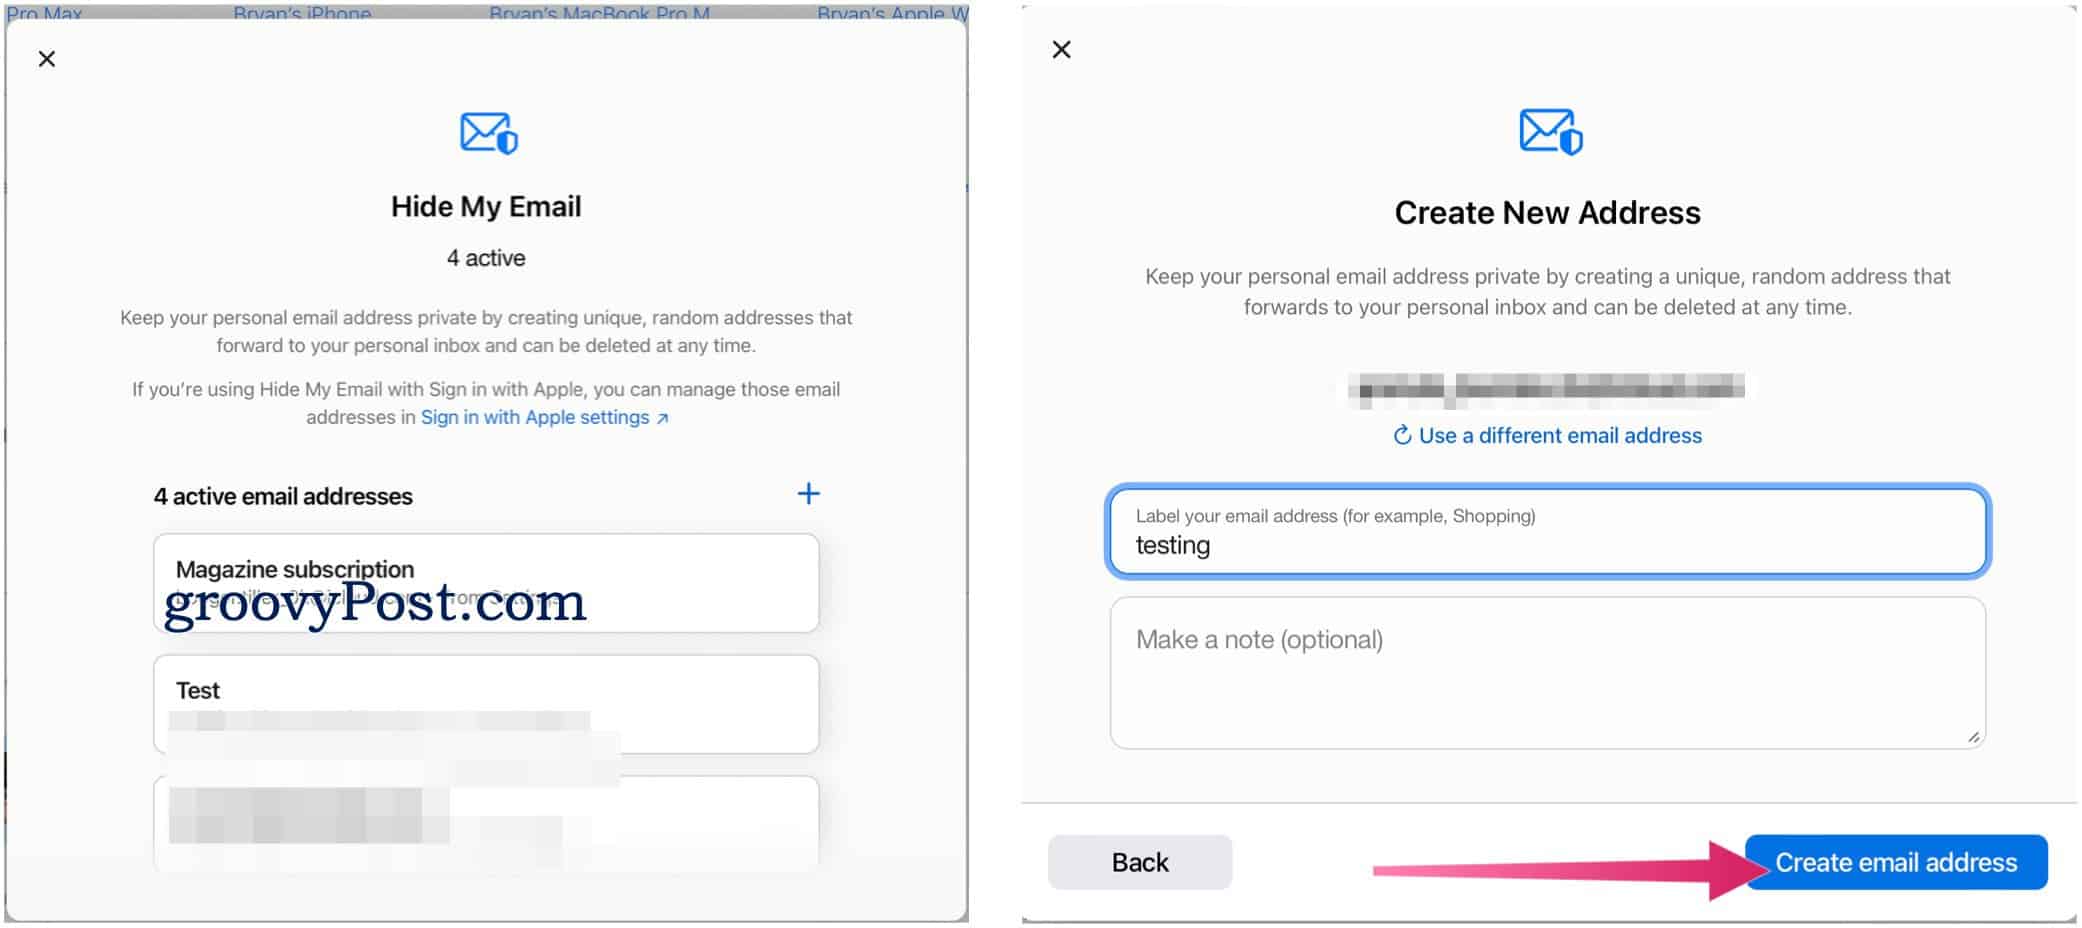
On iCloud.com, the steps to create a randomly generated email are as follows:
- Log into your iCloud account at iCloud.com in a web browser.
- Click Account Settings.
- Scroll down, then choose Manage under “Hide My Email.”
- Select the +.
- Notice the new email address or refresh to generate another one.
- Add a label for the address and a note, as needed.
- Choose to Create Email Address.
Deleting Random Emails
The easiest way to delete randomly created emails through the Settings app on your mobile device:
- Tap the Settings app on the device’s Home screen.
- Choose your name at the top.
- Select iCloud.
- Tap Hide My Email.
- Select the email from the list you no longer wish to use.
- Toggle off Forward To.
- Confirm by selecting Turn Off in the pop-up box.
- Repeat Steps 5 through September to deactivate other emails.
To do this process through iCloud.com:
- Log into your iCloud account at iCloud.com in a web browser.
- Click Account Settings.
- Scroll down, then choose Manage under “Hide My Email.”
- Next, click the email you wish to deactivate.
- Scroll down, select Deactivate email address, then confirm.

Hide My Email is a fantastic new feature for iPhone, iPad, and, once macOS Monterey launches, Mac. When properly used, it should cut down on the amount of spam and marketing emails you receive.
Be sure to check out our article on using Safari web extensions in iOS/iPadOS 15 and look at the seven hidden iOS 15 features to try on your iPhone.